You may be trying to fix another error with the Windows Update Troubleshooter while you run into the “Potential Windows Update Database Error Detected” message. It is one of those pesky Windows Update problems that sometimes just pop up and make our lives harder. We have a good list of fixes you can try to solve this problem.
Run DISM
DISM, or Deployment Image Servicing and Management, is a Windows service that can repair and obtain Windows image files in different ways. It can be helpful in fixing the error.
- Type “cmd” in the Search bar and click Run as administrator.
- Type “DISM /Online /Cleanup-Image /RestoreHealth” and hit Enter.
This runs a scan and fixes issues automatically. The process will probably take minutes and it has a tendency to get stuck for a little while at 20 or 40%. Don’t be discouraged and let it run!
Restart your computer and check if this fixed the issue. If it persists, you might need some more drastic methods.
Run SFC scan
SFC, or System File Checker, is a built-in Windows tool that can scan all protected files, and if it finds one that is corrupted, it replaces it with a cached version from earlier. So it might just do the trick for you, if you have problems with updates.
- Type “cmd” in the Search Bar, then click Run as administrator to open Command Prompt.
- Type “sfc /scannow” then hit Enter.
- Once the process is finished, restart your computer.
Note: If you run into an SFC /Scannow error when starting the scan, don’t worry. We have written dedicated articles on what to do if SFC scannow is not working, including:
- Windows Resource Protection Could Not Perform The Requested Operation
- Windows resource protection could not start the repair service
Perform a clean boot
If third party software is installed, it is possible that they are causing issues with a Windows update. Try rebooting your system without third party apps to check if this is the problem.
- Press Windows + R to open the Run app. Type “msconfig” and hit Enter.
- Under General, make sure Selective startup is selected, and uncheck Load startup items. This is so that only the Windows-related system elements start up.
- Under Services, check the Hide Windows services checkbox, and click Disable all. This disables all but Windows services.
- Restart your computer and see if the problem persists.
If this didn’t solve the problem, you need to tweak some settings. Try the following methods.
Reset Windows Update components from Command Prompt
Windows Update has a couple of services, which might cause this issue. It is simple to restart them all from Command Prompt, without having to figure out which one is causing the problem.
- In the Search bar, type “cmd” and click on Run to open Command Prompt.
- Type “net stop wuauserv” then hit Enter.
This stops the Windows update service.
- Type “net stop bits” then hit Enter.
This stops the BITS (Background Intelligent Transfer Service) that keeps up the connection between the client and the server.
- Type “net stop cryptsvc” then hit Enter.
This will stop the Cryptography Service.
- Type “net stop msiserver” then hit Enter.
This will stop the Windows Installer Service.
- Type “rename C:\windows\SoftwareDistribution SoftwareDistribution.old” then hit Enter.
- Type “rename C:\windows\System32\catroot2 Catroot2.old” then hit Enter.
- Type “net start wuauserv” then hit Enter to restart Windows Updates.
- Type “net start bits” then hit Enter to restart the BITS service.
Try to run the update now and see if it runs properly. If it doesn’t, you might have to delete the SoftwareDistribution folder.
Restart Windows Update services and delete problematic folders
DataStore and SoftwareDistribution are hidden storage folders that Windows creates to store old installation files. If you have a problem with update data, it might help to delete them. First we need to stop the Windows Update service.
- Type “services.msc” in the Search bar and click Run as administrator.
- In the list, find Windows Update, right-click and choose Stop.
- Navigate to C:\Windows\SoftwareDistribution\DataStore, hit Ctrl + A to select all, then right-click and choose Delete.
- Navigate to C:\Windows\SoftwareDistribution\Download and do the same to delete all files and folders.
- Open Services Manager again, right-click the Windows Update service and choose Start.
Now you can check with the Troubleshooter whether the update installs properly. If now, you may have to download it manually.
Download updates manually
If you fail to install updates, you may have to download them manually. To do so, take the following steps:
- Find out what update is the problematic one. Type “windows update” in the Search bar, and click Open.
- Click View update history. Here you will see the identifier of the update you failed to install.
- Go to Microsoft Update Catalog and type the number in question into the search bar. Select the update that fits your system and click Download.
- Click on the file you to download, then follow on-screen instructions to install the update.
Do an in-place upgrade
An in-place upgrade means that you are basically reinstalling the OS on top of the existing one, leaving apps, files and data unchanged, but replacing all the system files. This is an easy fix to many Windows update-related problem.
It comes with some caveats, though:
- you must be logged in as an admin (ie. not in Safe mode, not from a bootable disk
- you need at least 9GB free disk space
- you will lose custom fonts, icons, and downloaded language packs
- System Protection will be turned off, so if you want restore points to be created, don’t forget to turn it back on afterwards
- Go to Microsoft’s site and click on Download tool.

- When prompted, choose Save and save the MediaCreationTool1903.exe file.
- Run the file.
- Click Yes, if User Account Control is asking you to confirm.

- Click on Accept to accept terms and conditions.

- Choose Upgrade this PC now and click Next. Wait for the installer to run.
- Click on Accept to accept terms and conditions.
- Once the download is ready, click on Install. If you want to change what files to keep, click on Change what to keep.
- This takes you to a selection screen. Choose what you want to keep and click Next.
- The upgrade will now run. Wait until it’s finished. You should then be able to log into Windows and use it again.
If this didn’t solve the problem, you have another option: resetting your OS. This is not as drastic as it used to be, as Windows 10 gives you the choice to keep your personal files and apps.
Reset Windows
If all else fails, you can choose to reset your Windows. Windows 10 gives you a choice whether to keep or delete your personal files and apps.
Here are the steps you need to take to perform the reset:
- Go to Microsoft’s download site and download the Windows 10 install. Save it on a DVD or USB.
- Turn your computer off, load the DVD or USB the installation files are on, and start your computer while holding down Shift. This will take you to a screen where you can choose from different options.
- Click Troubleshoot.
- Choose Reset this PC.

- Choose between keeping your files or removing everything.
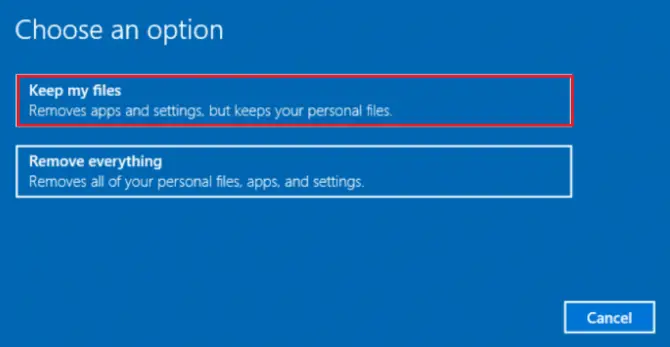
- The reset will complete by itself.
Conclusions
Windows updates can get tricky. One of the above solutions should solve your problems and let you continue with your work. Let us know what worked for you!