When something goes wrong with your computer and a Windows function fails, crashes or freezes, the most common recommendation is to run the SFC Scannow Command tool. Also known as the system file checker, this handy tool will scan your Windows system files to see if there is any corruption, damage, or inconsistencies. When these issues are found, the SFC will fix the files and typically solve your problem. Unfortunately, if the SFC isn’t working properly, you may get an error message when running it, stating that the “Windows resource protection could not perform the requested operation”. Let’s go over why this happens and how to fix this issue.

What Is The Cause Behind the Window Resource Protection SFC Scan Error?
While Microsoft hasn’t come out and directly stated what the cause is behind the “Windows resource protection could not perform the requested operation” SFC error, there are a few issues that could make it pop up.
- There is something preventing or conflicting with the SFC scan, and it cannot complete the check.
- There is a Windows server error.
- The SFC Scannow Command tool is malfunctioning.
Essentially, the requested operation (the scan) cannot be performed because something either went wrong with your SFC utility tool or there is an issue on the disk that is causing the scan to fail. Regardless of what causes the “Windows resource protection could not perform the requested operation” SFC error, there are a few ways you can fix it
5 Solutions to Fix the “Windows Resource Protection Could Not Perform the Requested Operation” SFC Scannow Error Message.
If you have tried running your SFC scannow command tool numerous times and are getting the above error with an immediate failure to scan afterwards, then there are some solutions below you should try.
1. Run a CHKDSK of Your Hard Drive
The first thing you should do is check the condition of your hard drive disk with a CHKDSK scan of your hard drive. This is a necessary step, because if your disk is damaged or has corrupted system files on it, this could be what is causing the “Windows resource protection could not perform the requested operation” SFC error message. Here is how to run a CHKDSK on Windows 10.
- In your computer’s search bar, type in Command Prompt.
- Right-click on the Command Prompt tool and run as an administrator.

- In Command Prompt, type in “chkdsk C: /r”
Please note: replace “C” with the drive where your Windows system files are located. Permitting that the chkdsk is successful and either fixes any errors, your SFC scan should now work. Retry to confirm or move on to the next solution below. - Hit Enter.
- Press Y to confirm you want the chkdsk to run on restart.
- Restart your computer to allow chkdsk to run its scan.

2. Run Your SFC Scannow in Safe Mode
If for some reason the chkdsk run fails or cannot repair any damage or corruption present and you still get the “Windows resource protection could not perform the requested operation” SFC error, you can try running the SFC scan in Safe Mode.
- In your computer’s search bar, type in msconfig. Hit enter on your keyboard and wait for the system configuration window to pop open.
- Click onto the boot tab which is located beside the general tab at the top.
- Check the box for “safe boot” under the boot options.
- Make sure “minimal” is check marked and then hit okay, and apply.
- Now restart your computer to reboot.

Now that you are in safe mode, run the SFC scan again. To do this, search for the Command Prompt tool, right-click to run as an administrator and open. Type in SFC /scannow [enter]. If the issue persists, move on to the next solution below.
3. Modify Security Descriptors in WinSXS Folder.
A lot of your Windows system updates and system files are stored in the WinSXS folder, and if your SFC utility tool cannot access this folder, it will fail and that is what prompts the error message. To get around this, you can modify the security descriptors of the folder.
- In your computer’s search bar, type in Command Prompt.
- Right-click on the Command Prompt tool and run as an administrator.
- In Command Prompt, type in ICACLS C:\Windows\winsxs [enter].
- Reboot your computer for the change in description to take effect.
Now try running an SFC scan again.
4. Enable Windows Module Installer.
If you have disabled the Windows Module Installer on your computer, SFC Scan is unlikely to work. This tool is what checks and installs all windows updates to your computer automatically. If you have it disabled, there might be bugs in your system which is causing the SFC scan to malfunction. Here is what to do.
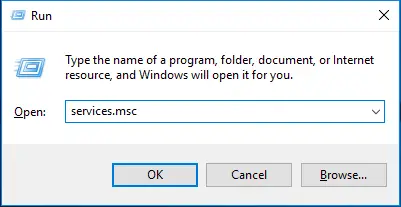
- Hit the Windows key on your keyboard + R to open the Run Dialogue box.
- Type in services.msc into the run dialogue box and hit okay.
- Find the Windows Module Installer in the list and right-click it.
- Choose to start it from the list.
Now try running the SFC Scannow Command tool and see if you get the same“Windows resource protection could not perform the requested operation” SFC error.
5. Run Recovery Commands.
If you are still getting the error at this point, and your current boot version of Windows is updated, you can boot into recovery mode and try to solve the issue this way by enabling the SFC scan utility via the command prompt. Here is how to do this.
- If your computer is on, restart it via the power options.
- When your computer begins its boot sequence, press F11 to enter recovery mode or use a bootable USB drive.
- Once you are in recovery mode, use the Command Prompt from the list of tools and hit run.
- Once Command Prompt is up and running, type in the following sfc/SCANNOW /OFFBOOTDIR=c:\ /OFFWINDIR=c:\windows [enter].
Once the above command is entered and executed properly, exit recovery mode and boot like you normally would to your Windows desktop. Then open up Command Prompt from your computer’s search, run as an administrator, and run the SFC scan to see if the issue persists.
Still Not Working? Run An Automatic Repair or Complete a Fresh Install of Windows.
If you have gone through all of the above solutions and are still getting the “Windows resource protection could not perform the requested operation” SFC error, then it is recommended that you run an automatic repair. Here is how to run an automatic repair on Windows 10.
- You will need a Windows 10 bootable installation disk or create a Microsoft Media Creation Tool either on a blank disk or onto a blank USB flash drive.
- Launch the media installation disk but instead of installing Windows, choose the “repair your computer” option which appears in the bottom left hand corner of the Windows Setup window.
- Select the troubleshoot option and then choose advanced options.
- Run the startup repair from the advanced options screen and wait for the process to finish.

Once the repair is finished, restart your computer and check to see if the “Windows resource protection could not perform the requested operation” error is resolved.
Wrapping It Up
If running an automatic repair does not fix the issue and you cannot get any of the other above solutions to work, the last resort option is to do a fresh install of Windows. While this is a bit frustrating, it will get you back up and running without the error. If you have any questions about any of the methods discussed above, please let us know in the comments below!
This is the best help ive found yet. Im lost on doing anything on a computer past hitting the power button. Thanks.
Thanks a million for your cooperation to solve my problem 🙋♥️👍
God bless you dude !
hi, i need a way to start windows module installer from cmd 🙁
From an admin cmd prompt :- SC “\\%servername%” start TrustedInstaller
What do you do if you’ve gone through all those steps and the install wizard is requesting you wait until Windows has started to plug in the installation media USB? I’ve gone through all these steps and it still won’t let me onto Windows, therefore I cannot follow these instructions and I’m stuck in the same system repair loop.
I went all the way to step 5. But I knew when you were talking about safe mode, already in step 2 out of 5, that if these steps didn’t do the trick nothing would.
Thanks. I’ll be using this site more !
I too have followed all these to try to fix indexing issue. I cannot turn it back on. Windows Search Service is not in my services list. WSearch is but says failed to read description – Error Code 2. I have repaired Windows and reinstalled it and still the same issue. any help would be greatly appreciated.
THanks a lot man. Step-3 worked for me like a charm.
Thank you!
Hi, I have a windows 11, nothing seem to work for me so far, i ran the sfc /scannow command both in and out of safemode, i have tried backing up the registry, and i used rufus to install ISO for windows 11 and when I clicked on “repair your computer, it still takes me back to an error and also i noticed the srt.txt location provided for me to check the error was not opening up the txt application for me to view the file.
Background: The problem first started after a power outage. No UPS was used during that time. I think my issues might also be related to registry backup. The registry files does not display any values nor 0 nor did i see any files when i copy the backup into the regback folder.
I need assistance. Thanks.
You might have to do a clean Windows reinstall. Just don’t forget to back up any data you want to keep.
I’m already doing this from the recovery environment in Windows 11 installation media, that’s how I got this error message! My system boots up but the screen goes black after the bootup screen with the loading spinner. No idea why it’s in this state; no idea what to do now.
Thanks for this excellent guide all the same! I write tech support guides occasionally so I know how much effort it takes.