Of all the issues that can plague a computer, few are more infuriating than crashes and unexpected restarts. Not only do they often involve the loss of hours of unsaved work, but can drastically affect the health and usability of the computer. There are many potential causes for crashes such as hardware failures, software glitches, outdated drivers and blocked processes by firewalls. However, manually narrowing down which cause is the actual culprit is incredibly time consuming, as it involves disabling programs one at a time until the source of the issue is found. So what tools can we use to speed up the process? The answer is a system already built into the Windows 10 environment: Windows Minidump (.dmp) Files. We’ll be exploring these minidump files, what they are, what they do and how you can analyze them to stop your computer from crashing.
What is a Windows Minidump (.dmp) file?
A Windows minidump file is a small collection of information gathered when Windows encounters an unexpected error that causes a crash in the operating system (OS). Each time Windows crashes, it will automatically create a new minidump file with a date-encoded file name, and store it in the %systemroot%\Minidump folder. This file contains only what Windows considers to be the most pertinent information at the time, such as:
- The error message and its parameters.
- RAM & CPU resource consumption.
- The appropriate kernel-mode call stack.
- What programs and applications were running at the time
- The state that the processor was in when it stopped – Processor context (PRCB).
- Process information and kernel context (EPROCESS) concerning both the process and thread experiencing the problem.
This means that while the file is small, roughly 2MB in size, it won’t capture any other error information that may have occurred alongside the crash, other than the pertinent information listed above.
What are Minidump Files Useful For?
Windows minidump files were designed to be used for the purpose of diagnosing and troubleshooting the cause of a system crash. The information gathered within a minidump file is all related to what Windows was experiencing at the time of the crash, so, you can read and analyze dmp files to reveal what stopped working and often find out why the system crashed.
While full sized crash dump files exist, they contain far more information than minidump files, making it harder to pinpoint an issue. This makes Windows minidump files far better suited to a speedy diagnosis and solution. Because of this, they are especially useful when troubleshooting a Blue Screen of Death (BSoD) issue. If you’d like to see our explanation of how to fix a generic BSoD error, you can find it here.
Do I Need a Special Program to View DMP Files or Open Them?
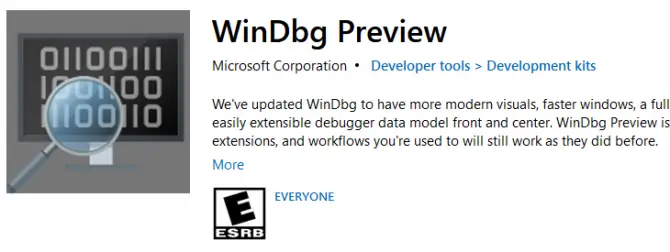
Windows minidump files aren’t the same as typical files, and as such do need a special program to open and view them. The most accessible and notable program available is the Windows 10 Debugger Tool (WinDbg), which is easily obtainable from the Microsoft website.
Another option is to use a program called BlueScreenView, which works very similarly to the WinDbg program. Simply download the zip file from the link above and extract the program to start. When you load BlueScreenView up, you will need to use it to open a Windows minidump file, which will allow you to view a summary of the problem and the cause behind it.
Finally, the program WhoCrashed attempts to do the same thing as BlueScreenView, but with a more user-friendly interface and a slightly more in depth analysis than a summary. It will offer more details on what the minidump file contains, as well as offer its own suggestions on what to do about the problem.

Note: it is highly recommended that you run any third-party program that you download through a virus checker before using.
How to Read and Analyze Minidump Files to Troubleshoot System Crashes
In order to view the information inside a minidump file, you’ll first need to open it. Luckily, WinDbg, included with the Windows Driver Kit, is capable of opening and analyzing minidump files in just a few short steps.
- Start by hitting the Windows key on your keyboard, and type “WinDbg” into the search box. If you do not already have the debugging tool installed, you will be redirected to install it.
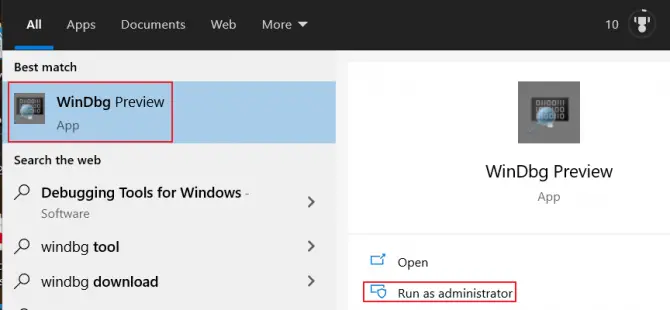
- Open the Windows Debugger Program by right-clicking it and selecting “Run as Administrator”.
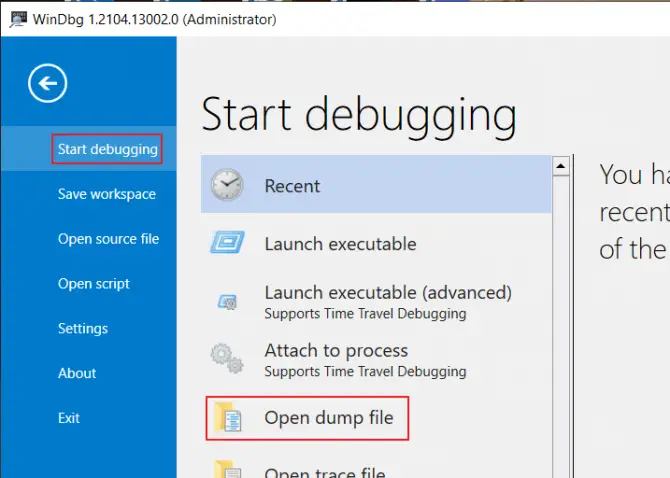
- In the menu bar, select “File,” then “Start Debugging” on the left.
- On the right, select “Open Dump File.”
- Look for the folder containing the desired dump file. As mentioned earlier, the default location for this is “%systemroot%\Minidump.” Double-click on the most recent minidump file. Opening the dmp file may take a few minutes.

- Near the bottom of the debugger window, type “!analyze -v” into the input box and press Enter. This will also take a few minutes to complete.
Now that the file is open, search for the headings labelled “MODULE_NAME” and “IMAGE_NAME.” These headings will indicate what program or driver is causing the problem, and potentially reveal some preliminary steps you can take to start addressing it.
Using a Third-Party App to Analyze and View Minidump (.dmp) Files – BlueScreenView
If you would rather use a third-party application to open the minidump files, then follow the steps below to install and use BlueScreenView.
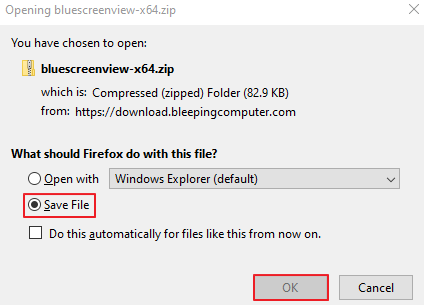
- Download BlueScreenView from this website link. You will need to choose between the 32-bit and 64-bit option.
- Choose to save the file.
- Head to your downloads folder and right-click the file.
- Extract all of the files to an unzipped folder.

- In the unzipped folder, run the BlueScreenView application file.

- BlueScreenView will now automatically scan your minidump file.
- Crash details will be displayed in a list within the top window pane of BlueScreenView.
- In the lower window pane, you will see associated drivers with the crash.
- Double-click on the driver of the latest crash to see the properties of the errors in a neat table format.
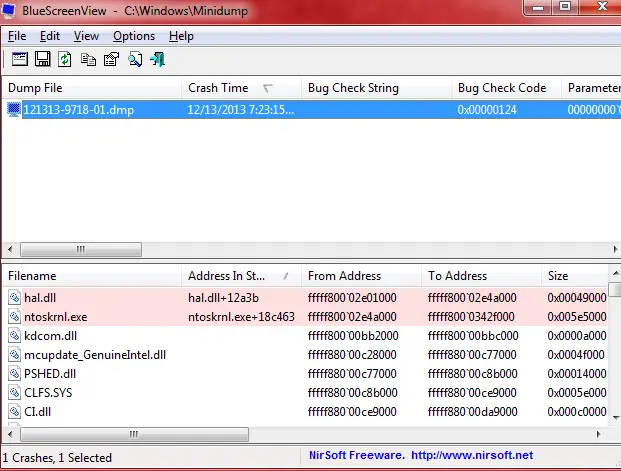
In the table format, you will see the dmp file name, crash time, bug check, bug check code, parameters, which driver caused the crash, file version, and more.
If you want to send an HTML report to a technician for troubleshooting, just right-click the dump file and choose HTML Report – All Items. If this crash occurs regularly, you can save the reports for future debugging by right-clicking the Windows minidump file and choosing Save Selected Items.
Wrapping it Up
When it comes to diagnosing software based computer crashes, Windows minidump (.dmp) files are an invaluable asset in any computer owner’s toolbelt. By using these files, you can quickly, and easily, determine what program, application or driver is causing your computer to crash, as well as acquire some steps you can take to try and fix the problem straight away. Although they don’t contain as much information as full Crash Dump Files, and won’t reveal if any additional errors occurred, the info they do contain is invaluable for obtaining a quick diagnosis and developing a recovery method.