There’s almost nothing more frustrating than encountering a prompt on your device that you can’t ignore, especially when it interferes with using it how you need to. Unfortunately, the stubborn “Cannot Verify Server Identity” error message within iOS’s Mail app is a prime example, as the root of its issue can be pretty difficult to track down.
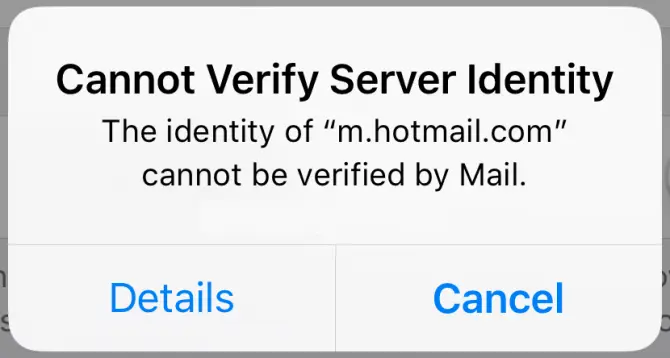
What does the “Cannot Verify Server Identity” error message mean?
The “Cannot Verify Server Identity” error message is usually related to a discrepancy between the SSL certificate on the mail server and your device’s server settings.
Before connecting to a mail server securely, an iOS device must retrieve the server’s SSL certificate to check if it is reliable. If the device finds the certificate to be expired, not matching the domain name, or signed by anything other than a well-known company, the certificate will be marked as unreliable. The device’s attempt to make a secure connection will fail, and it will then proceed to display the “Cannot Verify Server Identity” message.
When do you see this error?
The “Cannot Verify Server Identity” error can often occur after a mail server’s certificate has changed – usually by switching to a new issuer. The error message can also appear while a new account is being set up on an iOS device or after an account migration. However, while these are some of the most common causes, the error has also appeared with popular mail servers (e.g. eas.outlook.com, imap.gmail.com); and therefore, can appear while using any mail server.
What are the root causes?
This error is generally attributed to untrusted or invalid email server settings. However, perfectly valid certificates can also be misclassified by your device. In these circumstances, the problem usually lies with a bug in the operating system.
7 proven methods to solve the ‘Cannot Verify Server Identity’ error on iPhone and iOS
No matter the root of the issue, the following list of various fixes will be sure to remedy this frustrating error.
Restart the Mail app
While the error message is pretty clear in stating the apparent issue with the mail server, it can very well be attributed to other in-app problems. This fix entails simply quitting and restarting the Mail app to eliminate its potential faults as possibilities as you troubleshoot.
If you are using a device with a physical Home button:
- Double-press the Home button in rapid succession to view recently used apps.
- Swipe left or right through the rolodex of open applications and locate the Mail app.
- Close the app by swiping up on its preview.
If you are using a device without a physical Home button: (iPhone 8 and later models)
- Go to the Home screen.
- Swipe up from the bottom of your screen and pause slightly in the middle of the display.
- Swipe left or right through the rolodex of open applications and locate the Mail app.
- Close the app by swiping up on its preview.
After quitting the Mail app, relaunch it by clicking its icon. If the error recurs, move on to the next solution.
Reboot your phone
Turning your phone off and on again is a rather helpful method in the case of minor system glitches.
If you’re using an iPhone 8, 8 Plus, or earlier versions:
- Press and hold the top or side button until the Power off slider appears.
- Drag the slider to power off your device completely.
- After about 30 seconds, press and hold the top or side button again to turn the device back on.
If you’re using a later model:
- Press and hold the side button and either volume button until the Power off slider appears.
- Drag the slider to power off your device completely.
- After about 30 seconds, press and hold the side button again to turn the device back on.

Fortunately, this solution won’t have any bearing on your stored data within the device’s internal memory, so a system backup isn’t required. After rebooting the device, relaunch the Mail app by clicking its icon. If the error recurs, move on to the next solution.
Reset network settings
Incorrect or invalid network settings could very well be the culprit of the “Cannot Verify Server Identity” error message, as default options and values can change with user customization. By performing a quick reset of network settings, you can address the issue from another angle.
To reset network settings, follow these steps on any model of iOS device:
- Start on the Home screen and launch Settings.
- Select General.
- Navigate to and select Reset.
- Select Reset network settings. (if applicable, confirm your device’s passcode in order to perform the settings reset)
- Confirm that you would like to reset your device’s network settings.
- Wait for the device to automatically reboot when the reset is finished and start setting up your WiFi network to reconnect to continue using online services.

After resetting network settings and rebooting your device, try relaunching the Mail app. If the error recurs, move on to the next solution.
Ensure iOS is up to date
While a bit less convenient than quickly restarting an application or your device, ensuring that your version of iOS is up to date is yet another fix to the “Cannot Verify Server Identity” error. The issue can result from operating system bugs, so a check of your device’s latest software can rule out this possibility in your troubleshooting.
Updates are usually embedded with fix patches that address existing issues, but devices require sufficient storage space and battery life to be able to undergo the entire process.
The following steps apply to any model of iOS device:
- Start on the Home screen and launch Settings.
- Select General and then Software Update.
- If an update notification appears, read and review the new iOS version information and follow onscreen instructions to begin installation.
- Unless your device reboots automatically, reboot it to apply recent system changes.

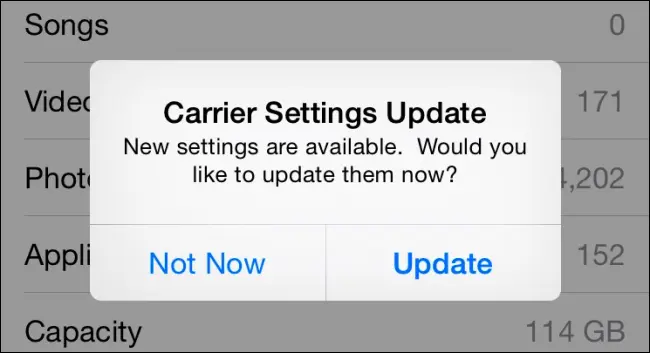
Carrier settings updates can also remedy the error if it is attributed to network issues.
To perform a carrier update, follow these steps on all iOS devices:
- Start on the Home screen and launch Settings.
- Select General and then About.
- Navigate to the Carrier section.
- Follow onscreen instructions to install the latest carrier update to your device.
- Unless your device reboots automatically, reboot it to apply recent system changes.
After installing necessary updates and rebooting your device, try relaunching the Mail app. If the error recurs, move on to the next solution.
Remove your email account and add it back
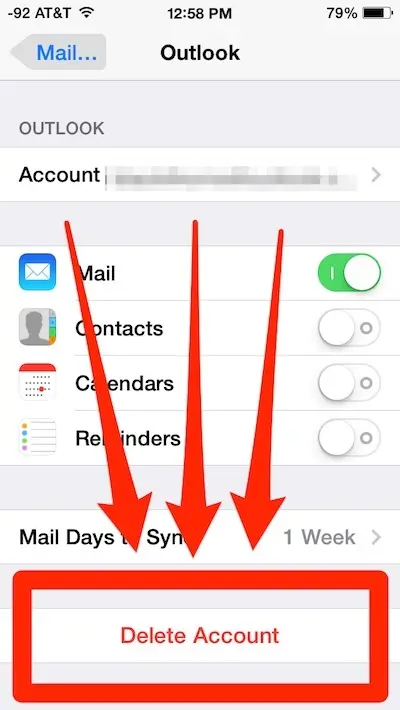
Another option to resolve the “Cannot Verify Server Identity” error is to remove and re-add the email account in question.
The following steps apply to any model of iOS device:
- Start on the Home screen and launch Settings.
- Select Accounts & Passwords.
- Navigate to the Accounts section.
- Select the email account that is presenting the error message.
- Select Delete Account at the bottom of the screen.
- Select Delete from My iPhone to confirm the action.
To re-add the account:
- Start on the Home screen and launch Settings.
- Select Accounts & Passwords.
- Select Add Account.
- Select your email service provider.
- Enter all required information and follow any onscreen instructions in order to complete the process.
Repeat this process for any other email accounts established on your device that is showing the error.
After replacing each email account on your device, try relaunching the Mail app. If the error recurs, move on to the next solution.
Return to default settings
The “Cannot Verify Server Identity” error message can possibly arise from a software issue that might be difficult to track down. Resetting all system settings to their default functions will be sure to do a clean sweep for any possible issue.
Warning: Resetting all settings will erase all data from the Settings app on your device.
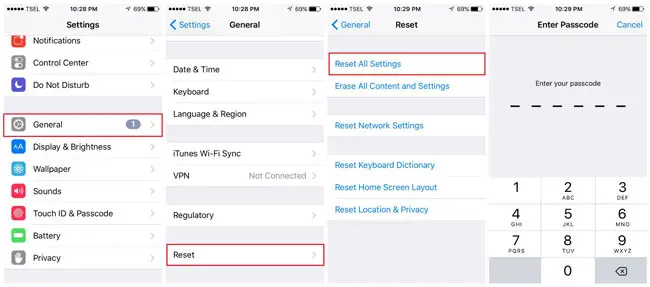
The following steps apply to any model of iOS device:
- Start on the Home screen and launch Settings.
- Select General.
- Select Reset and then Reset All Settings. (if applicable, confirm your device’s passcode in order to perform the settings reset)
Last resort option: Perform a factory reset
If the error continues, more complex system complications could be the root of the issue. As a last resort, your device might be due for a master reset or factory reset.
Warning: If you choose to proceed with this solution, note that everything will be wiped from your device, including anything that may have caused the “Cannot Verify Server Identity” message to appear. It’s wise to back up all important data to iCloud, iTunes, or another cloud storage service so they are not lost in the reset.
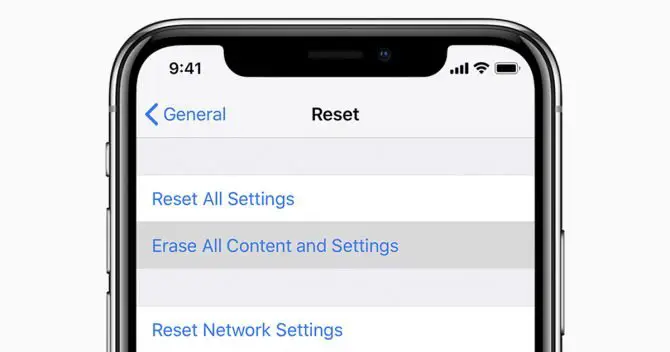
To perform a factory reset, follow these steps on any model of iOS device:
- Start on the Home screen and launch Settings.
- Select General.
- Navigate to Reset and select it.
- Select Erase all content and settings. (if applicable, confirm your device’s passcode in order to perform the settings reset)
- Confirm that you would like to reset the device’s system.
- After the process is complete, set up your device as it was using the start-up wizard guide.
- As you set up your email account(s), ensure you’re using valid email account credentials.
After setting up your device, try relaunching the Mail app.
Conclusion
Troubleshooting an error that may require you to reset your device presents nothing less than a headache, but a solution that has your applications working as they should is definitely worth the effort. With several options for you to try, we’re confident that at least one has done the trick.
Your network reset should be one of the first things to do not near the last, it’s a simple reset.
Fair point. I have moved the network reset method up the list. Thanks for the feedback.