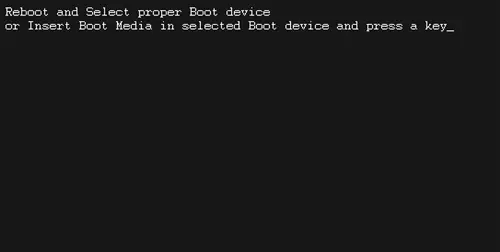
It is never a nice thing to boot your computer system up, only to be met with an error screen that prevents you from booting into your operating system or from doing anything at all for that matter. It creates a sense of panic and confusion, because you can’t access anything at all, regardless of how many times you reboot your computer. This is what happens for a lot of Windows 10/8/7 users who get the “reboot and select proper boot device” black screen error message. This error can show up out of nowhere due to corrupted system files, a failed or failing hard disk drive, or even appear if you’ve mucked around with the computer’s boot order. Let’s take a look at the various causes that prompt this error message and 8 ways you can fix it.
What Is the “Reboot and Select Proper Boot Device” Error & What Causes It?
The “reboot and select proper boot device” error simply means that your computer’s basic input/output system or BIOS, cannot find the boot device that contains your operating system. It is prompting you to restart your computer, enter into your computer’s BIOS system (UEFI) and select the correct boot device that contains your operating system and have the computer boot from it. Several causes can prompt this error message to come up, including physical issues and software problems.
- Physical issues can include your boot disk not being connected properly to your computer’s hardware, having a boot disk that is damaged or has failed, or having a faulty cable, damaged SATA slot or a dead hard drive.
- Software issues may include an inactive boot partition, a damaged or corrupted master boot record (MBR), a wrong boot sequence in the BIOS, corrupted or lost boot files, or an operating system that has become corrupted.
To boot into your computer’s BIOS, you will need to restart the computer and continuously press a specific key that allows you to enter your computer’s BIOS system. This key can be anything from the ESC, DEL, F2, F8, F10, or F12 key and is usually displayed on the post screen or can be found in the manual that comes with your computer’s motherboard. Press this key until your computer boots into the BIOS system and then use the solutions below to solve the problem.
Solution 1: Check the Power Cable Connecting Your Hard Drive Disk.
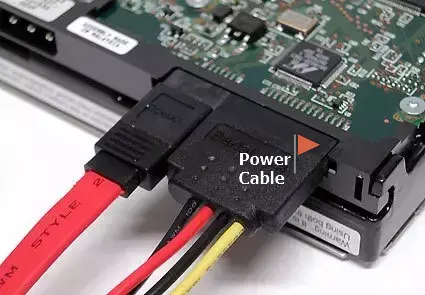
Your hard disk drive that stores your operating system must be connected to your motherboard with a power cable. If that power cable is broken, frayed, or connected improperly, it is likely that your hard drive isn’t being detected by the computer.
- Shut your computer down and open it up.
- Find the power cable running from your hard drive disk to your motherboard and check to see if it is physically damaged or not connected properly.
- If it looks to be connected properly and you are still getting the error, remove it from your computer and test it on another one.
- If the error occurs on the test computer, replace the power cable with a new one.
If the error does not occur on the test computer, re-attach your power cable properly and move on to the steps below.
Solution 2: Clean Your RAM.
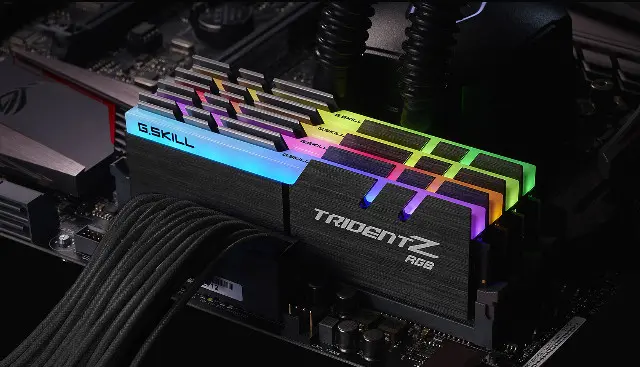
If your RAM hasn’t been cleaned or removed since you got your computer system, it may be the cause of the error. To clean the RAM, shut your computer down and pull off your computer’s sideboard by removing the screws from the tower/bottom of the laptop and locate your RAM. Unlock the clamps that keep your RAM in place and slowly remove them from their positions. Clean any dust off the RAM with the soft cloth and reposition them back into their slots. Clamp them in place, close your computer up, and reboot to see if the error persists.
Solution 3: Check if Boot Drive is Detected in BIOS.
Your boot drive might not be detected in your computer’s BIOS. To check this, do the following.
- Reboot or boot your computer and press the post screen designated key to get into your computer’s BIOS.
- On the main screen of your BIOS, you should see a list of all devices that are detected by your BIOS. This will include your fans, hard disk drives, and any other hardware you have connected like a DVD/CD drive.
- If your hard disk drive is not listed, shut your computer down.
- Open your computer up and either a) connect your hard disk drive to another SATA slot or b) use another SATA cable to connect your hard disk drive to another SATA slot in your motherboard.
- Reboot into your BIOS to see if your hard disk drive is detected. If it is, you know that it was either the cable causing the problem or the SATA port on your motherboard.
If your hard disk drive still isn’t appearing in the BIOS, the boot disk may be corrupted, failed, damaged, or dead.
Solution 4: Check Boot Order in BIOS.
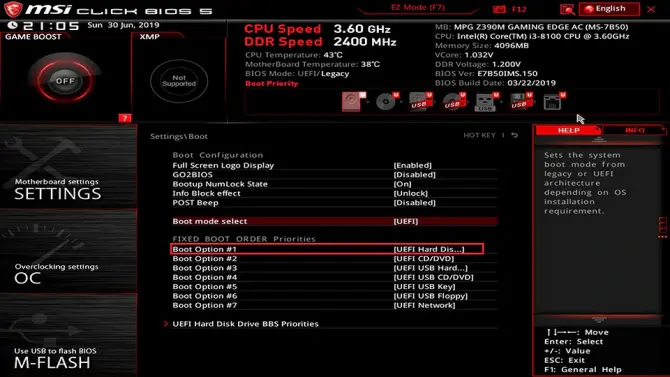
Sometimes the boot sequence can get mucked up and cause the “reboot and select proper boot device” error to pop up. To check the boot order in your BIOS, boot the computer up and enter the BIOS with the post screen key.
- Once in the BIOS, head to the “startup” or “boot” tab or screen. In newer BIOS systems, the boot order may appear on the main screen.
- If you cannot locate the boot sequence, try the advanced BIOS features to find it there.
- In the boot sequence list, your boot disk should be the first device listed.
- If it is not listed in the first position but it does appear in the list, move it to the first position. In newer BIOS systems you can simply drag and drop to change the boot order. In older BIOS systems you may need to use your arrow keys.
- With the boot drive in the first position, save the changes and reboot your computer.
Solution 5: Disable/Enable Legacy Boot.
In some cases, your basic input/output system (BIOS) may come with a feature called a legacy boot, which can cause the “reboot and select proper boot device” error. Simply disabling it or enabling it, can fix the error message.
- Restart your computer and enter the BIOS.
- Look for the legacy boot option. You may need to go through all tabs and/or settings in your BIOS to find it.
- Once found, if it is enabled, disable it. If it is disabled, enable it.
- Save the changes and exit the BIOS.
- Restart your computer.
Solution 6: Set BIOS to Best Defaults.
While this solution is a bit of a long-shot, sometimes not having your BIOS set to its default values can cause instability. This instability may be the cause behind the “reboot and select proper boot device error”. To access this, reboot your computer and load into your BIOS and look for an option that allows you to “load optimal defaults”. Load the defaults and restart.
Solution 7: Use Command Prompt to Activate an Inactive Partition.
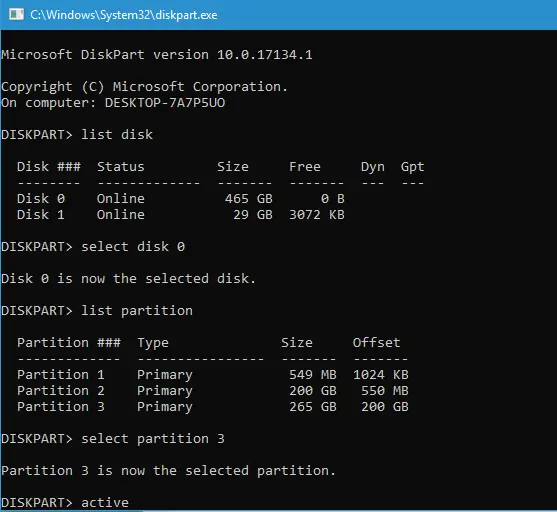
If the primary hard drive partition on your boot disk is no longer set to be active, then you can get the “reboot and select proper boot device” error message. By setting your primary hard drive partition as active, you will negate the error. You will need a Windows installation media disk or recovery disk for this process and you will need to set it as the priority boot media in your BIOS.
- Follow the on-screen instructions until you get the option to repair, restore, or recover your computer.
- Click any of these and you will either see a System Recovery Options screen on Windows 7/Vista or a Troubleshoot screen on Win 10/8.
- Choose the command prompt from the list and enter the command line: diskpart [enter].
- Then enter the command line list disk [enter] to get a list of disks installed on the computer.
- Then enter the command line select disk 0 [or whichever disk is the one with the inactive partition on it] and hit [enter].
- Then enter the command line list partition 1 [or whichever partition is the inactive one] and hit [enter].
- Then enter the command line active [enter] to mark it as active.
- Diskpart will tell you that the partition has been made active.
- Exit the command line and restart your computer to see if the error persists.
Solution 8: Fix Windows Boot Files.
If you don’t believe that the error is originating in the BIOS and it isn’t a physical problem with your hard disk drive, you could try repairing the Windows boot files to see if they were corrupted and causing the error. You will need a Windows media installation disc or repair disc to get the job done though.
- Insert the repair disc into your CD/DVD drive and let it run. You may need to tell your BIOS to boot from this disc.
- Once you see the Windows setup screen come up, instead of clicking on install now, click on “repair your computer” to enter the Windows Recovery Environment.
- Now you will want to run the command prompt.
- For legacy BIOS users you will need to type in the following command lines, hitting enter after each one: bootrec /fixmbr [enter], bootrec /fixboot [enter], and bootrec /rebuildBCD [enter].
- For UEFI users, simply type in bcdboot C:\windows [the letter being your hard disk drive].
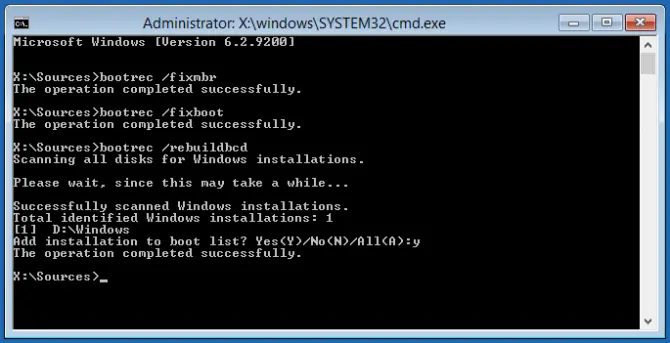
Once these steps are done, quit the command prompt and reboot. If the problem persists then your Windows boot files were not the problem.
If none of the above solutions work to fix the “reboot and select proper boot device” error message, then try updating your SATA drivers by using Safe Mode. If this doesn’t work, you can try replacing your motherboard’s CMOS battery which is your motherboard’s memory system that contains errors. Or, you may need to do a reinstall of Windows completely if you suspect your operating system is corrupted or if the hard disk boot drive is damaged, corrupted, or dead.
how do i move boot config to the list? its in the second position now