Have you encountered persistent internet connection issues that you just can’t seem to fix? While definitely common, experiencing the ‘Windows can’t communicate with the device or resource (primary DNS server)’ error can be one of the most frustrating things to deal with, especially if it interrupts the regular flow of your day-to-day life. To start fixing your connection, it’s important to determine what is causing the error and apply the necessary troubleshooting techniques to be able to address the problem. But before we delve deeper, let’s go back to the basics. What exactly is a DNS server?
What is a DNS server?
DNS stands for domain name system. It’s a type of server that functions as an online directory that matches domain names with numeric IP addresses so that users would arrive at the correct website that they are trying to reach. After all, it would be too much of a hassle to memorize numeric IP addresses, right? Through the domain name system, users would only have to type in alphanumeric characters and your internet-connected computer will do the rest for you.
How does a DNS server work?
As previously mentioned, a DNS server translates alphanumeric characters into IP addresses whenever a user is trying to access a specific website. This means that end-users won’t have to enter unique IP addresses – making surfing the web a lot more convenient. However, there are times when your browser would not be able to establish a connection to the internet. This could stem from a plethora of things like outdated drivers, a malware infection, or a defective router. To better understand why this error happens, let’s first talk about what a primary DNS server error means.
What does the “Windows can’t communicate with the device or resource (primary DNS server)” error mean?
Put simply, a primary DNS server error occurs when your system suddenly becomes unable to connect to the internet. However, DNS server error can also indicate poor internet connection or the onset of much more serious connectivity problems.
What causes a primary DNS server error?
The most prevalent cause of a primary DNS server error is network failure. Typically, this signals problems on the user’s end where hardware and software issues may affect how devices are connected to the internet. DNS server errors may also originate from outdated drivers to more complex configuration issues. In the next section, we’ll talk about the most common root causes of a primary DNS server error and how to fix them. Read on to find out more.
7 proven methods to solve the “Windows can’t communicate with the device or resource (primary DNS Server)” error on Windows 10
The bad news is that there is no one-size-fits-all approach when it comes to fixing primary DNS server issues since there can be a lot of reasons why your connection is acting up. The good news is that we did the heavy lifting for you and compiled a few troubleshooting solutions that you can easily follow. Check them out below.
Update your drivers
It’s possible that your network issues are caused by outdated drivers. It’s important to note that keeping your drivers up-to-date is key to avoiding connectivity issues and ensuring that your system is performing as it should. To update your drivers, check out this step-by-step guide:
- Press the Windows key + X shortcut to open the Quick Link menu.
- Click Device Manager.
- Once you’re in the Device Manager menu, scroll to Network Adapters and locate your device.
- Right-click and choose Update driver.
- Once a new pop-up window is open, you can choose between searching automatically for drivers or manually browsing your computer to find the right driver.
Change your adapter settings
If updating your drivers didn’t fix the issue, you can also change your adapter settings. Note that you need to restart your PC after making changes to your settings to make sure that the issue has been resolved.
- Open the Control Panel.
- Click on “View network status and tasks” under the Network and Internet section.
- Click Change adapter settings.
- Right-click the network you’re currently using and select Properties.
- Find and select Internet Protocol Version 4 (TCP/IPV4) and click Properties once again.
- Make sure that “Obtain an IP address automatically” and “Obtain DNS server address automatically” are both selected.
- Click OK to save changes.
- Restart your computer.
Clear your DNS cache
If updating your adapter settings didn’t work, try clearing your DNS cache. Your system’s DNS cache refers to copies of DNS lookups on your computer’s browser. Simply put, it temporarily stores the IP addresses of the websites you have visited during a certain period of time. By clearing your DNS cache, you are effectively securing your system against bad actors as well as solving technical problems such as the “Windows can’t communicate with the device or resource (primary DNS Server)” error. Flushing your DNS cache enables your computer to request new DNS information after removing all previously stored data in the cache. To flush your DNS cache, follow these steps:
- To start, Press the Windows + R keys.
- Once the Run window opens, type “cmd” to open Command Prompt. (Make sure you are running command prompt as an administrator.)
- Type “ipconfig /flushdns” and press Enter. (Do not forget to put a space before the forward slash)
- Once the process has been completed, you will receive a message saying “Successfully flushed the DNS Resolver Cache.”
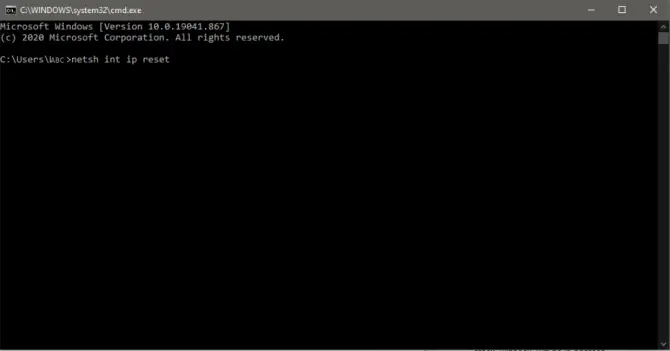
Reset TCP/IP
TCP/IP, or Transmission Control Protocol/Internet Protocol, is a communications protocol that enables various devices to interact and communicate over long distances. Two other reasons why you might be experiencing the “Windows Can’t Communicate With the Device or Resource” error are incorrect TCP/IP settings or a corrupted TCP/IP stack. To address this, knowing how to reset TCP/IP settings can be a helpful way to fix your connectivity issues.
- Start by pressing the Windows + R keys at the same time.
- Once the Run window opens, type “cmd” to open Command Prompt. (Again, make sure you are running command prompt as an administrator.)
- Type “netsh int ip reset” and press Enter.
- After the process has been completed, you will be required to restart your computer.
Use Google DNS
Another way to get around the “Windows can’t communicate with the device or resource (primary DNS server)” error is to connect to a different DNS. In this section, we’ll walk you through manually switching to a public DNS such as Google DNS.
- Open Control Panel and click Network and Internet.
- Click Network and Sharing Center.
- Click Change adapter settings.
- Right-click your active network connection and click Properties.
- On the Networking tab, highlight Internet Protocol Version 4 (TCP/IPv4) and click Properties.
- On the General tab, select “Use the following DNS server addresses:” and type in the following:
- Preferred DNS server: 8.8.8.8
- Alternate DNS server: 8.8.4.4
- Click OK to save changes and exit.
- Remember to restart your computer to see if this solution solved your problem.
Restart your modem and router
Simple fixes can sometimes solve even the most complicated problems. If you haven’t tried it yet, restarting your modem and router may help.
- Check the back of your router.
- Search for the button named Reset.
- Find a pen or a pin that would allow you to press the Reset button. Hold it down for 5-10 seconds.
- After you release it, your router will begin to reboot.
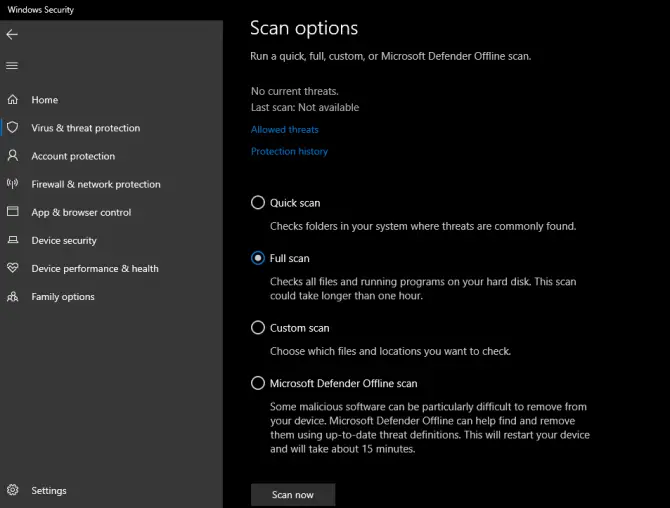
Scan for malware
Another reason why might be experiencing a primary DNS server error is that your PC may be infected by malware. If you’ve tried all of the fixes above and the problem still persists, it would be wise to perform a malware scan to rid your system of threats that may cause it harm. To scan your computer for malware, follow the step-by-step guide below:
- Begin by opening the Windows Settings.

- Click Update & Security.
- On the left side of the new window, choose Windows Security and select Virus & threat protection.
- A new pop-up will emerge and, in this window, click Scan options.
- Select Full scan and hit Scan now.
Wrapping Up
There you have it. We hope our tips enabled you to resolve the “Windows can’t communicate with the device or resource (primary DNS server)” error. While fixing DNS errors may seem like an overly complicated task, following the steps we provided in this article will make the process a little less arduous. Do you have other tips that you can share to fix this particular tech issue? Let us know by commenting below!
