Storing and sharing files can be one of the most frustrating experiences of the digital age. From lost files to corrupted files, many of us have wished for better ways to ensure information gets to where it needs to go. Luckily, there are FTP servers for that, and you can set up one of your very own using nothing more than a Windows 10 computer and an internet connection. In this article we are going to show you how to set up an FTP server on Windows 10 in a few easy steps.
What is an FTP Server and What Does it Do?
A File Transfer Protocol, or FTP server, is a form of internet cloud storage that allows you to store and share files between computers using an FTP Client (such as Windows File Explorer). Not only is it private and secure, but doesn’t come with the usual limitations that typical cloud storage services do. Businesses often use FTP servers in order to secure sensitive data, control who has access to it, and make both sharing and recovering files quick and easy.
Creating Your Own FTP Server on Windows 10
Creating your very own FTP server is simple and is a feature built right into Windows 10. Just follow these steps:
- Press the Windows key on your keyboard, type “Control Panel” in the search field, and click that option.
- Click on Programs and then Programs and Features.
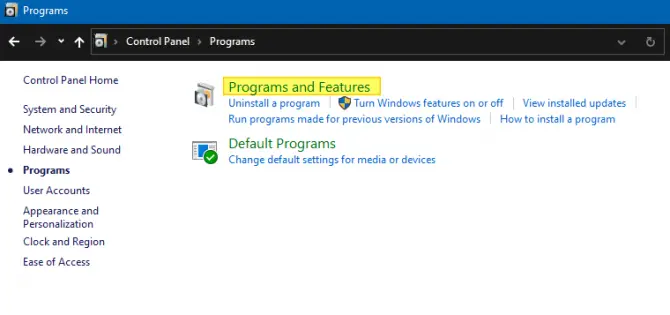
- On the left-hand side of the window, find and select ‘Turn Windows Features On or Off‘. This will open a new, smaller window.
- Locate and expand Internet Information Services by clicking the small plus sign next to it, then do the same with FTP Server.
- Click the checkbox beside FTP Extensibility then do the same with Web Management Tools just below.
- Click on the OK button and allow Windows to install the feature. Once this is complete, click the close button.

How to Configure Your FTP Server
The above process installs all the necessary features, but your FTP server still needs to be configured for use. To do so, follow the below steps:
- Open your Control Panel again, then locate and select System and Security.
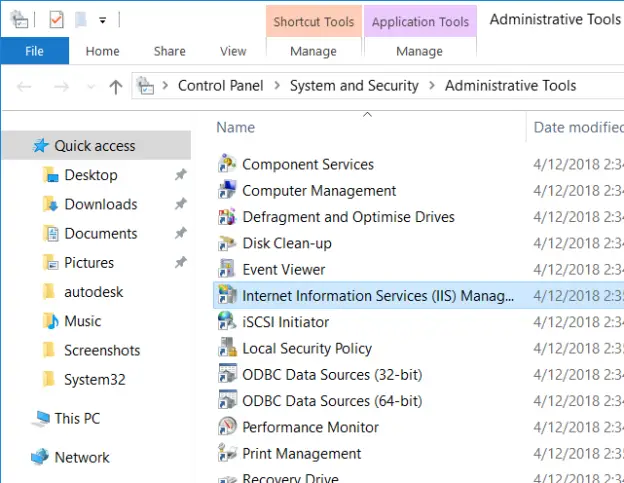
- Click on “Administrative Tools” which should open in a new window.
- Locate Internet Information Services (IIS) Manager and double-click this option. If this option does not appear, you will need to download it from Microsoft, which can be found here.
- On the left-hand side of the new window that opens, under the Connections menu, locate and expand your computer’s designation by clicking the small arrow next to it.
- In the revealed menu, right-click on Sites and select Add FTP Site.
- You will be prompted to give your new FTP site a name, and to choose a physical file path for files to move through. You can choose an existing folder, or make a new one using the ellipsis button next to the text box. Click Next once finished.
- In the window that follows, leave all the settings as their defaults except for SSL, which you can change to No SSL. However, if you are planning on using your FTP server for sensitive data, you should set up SSL for added security. Click the Next button.
- Under Authentication, select Basic, then select Specified Users under Authorization and enter either your username for your computer, or the email address associated with your Windows 10 account. Finally, check off both Read and Write, and click Finish.

How to Allow Access to Your FTP Server
Now you can access your FTP server to store and retrieve files quickly and easily by using the folder you selected in step 6 of How to Configure Your FTP Server. However, if you use Windows Firewall, you’ll need to give your FTP server permission to connect through it. Here’s how:
- Press the Windows Key on your keyboard and type “Windows Firewall” into the search field. Locate and select Windows Defender Firewall.

- In the window that follows, select “Allow an App or Feature Through Windows Defender Firewall” on the left-hand side.
- On the right, click the Change Settings button, then locate FTP Server in the list beneath.
- Put a check in the box beside it, as well as in the boxes in both the Private and Public columns.
- Finally, click OK to save your settings.

You should now have complete access to your FTP server on your local network through your FTP client of choice.
Note: If you use other security software, you will need to configure it to allow this access as well.
How to Connect to Your FTP Server From Outside the Local Network (LAN)
Accessing your FTP Server through the internet requires something called Port Forwarding, which is like building a pathway to your server through your router. You can check your router’s manufacturer support website for specific instructions, but most routers follow the same setup.
- Press the Windows key and type “Command Prompt” into the search field. Locate and click this option.
- In the Command Prompt window type the command “ipconfig” and press the Enter key.
- This should reveal your Default Gateway IP Address. It should look something like: 192.168.X.X
- Take note of this, as well as your IPv4 address.
- Open your favorite web browser, and type the Default Gateway IP Address into your browser’s address bar. You will be greeted by your router’s management console.

- You should be asked to sign in. To do so, you’ll need your router’s credentials which are NOT the same as your WiFi username and password. These may be located on the back of your router, or may simply be “admin” if you’ve never changed them yourself.
- Once logged in, locate the Port Forwarding section in the management console, usually located within the WAN or NAT settings.
- Create a new Port Forwarding entry with the following information:
- Service Name: You can choose any name, such as the name of your FTP Server.
- Port Range: Use port 21, as this port is required.
- PC’s TCP/IP Address: Use the IPv4 address we located in step 3.
- Local TCP/IP Port: Again, use port 21.
- Protocol: Select “TCP”.
- Click the Save or Apply button to save your configurations.
Once you have successfully forwarded port 21, you should be able to test your FTP server’s access, both locally and through the internet.
To test locally, open your default browser and type FTP:// followed by your computer’s IP address. It should look something like FTP://192.168.X.X.
To test through the internet, open your default web browser, go to a search engine like Google, and search “What’s my IP?” taking note of the public IP address that appears. In a new tab, type FTP:// followed by that public IP address and hit enter. Both these tests should result in you being prompted to sign in. If they do, everything is working as expected and you should be able to sign in using your FTP server’s credentials, giving you access to browse and download files from any computer.
How to Manage Your FTP Server with an FTP Client
In order to actually upload files to your FTP Server, you’ll need an FTP Client. Luckily Windows File Explorer has a built-in FTP Client, and here’s how to use it:

- Open Windows File Explorer. You can do this by pressing the Windows key and typing it into the search field, or by pressing the Windows and E keys together.
- In the address bar at the top, type in FTP:// followed by your public IP address, which we found to test accessing your FTP Server through the internet.
- This should prompt you to sign in. Do so using your FTP credentials and click the Save Password option for ease of access, then click the Log On button.
And that’s it, you can now browse, download AND upload files from your computer as if your FTP server were just another hard drive.
Additionally, when in your FTP server, right-click the Quick Access option on the left-hand side of the window and select “Pin Current Folder to Quick Access”. This will allow you to quickly access your FTP server without the need for entering your public IP address into the address bar.
Wrapping it Up
Having a Private FTP server grants you an enormous amount of flexibility with file storage and sharing. Not only does it remove a lot of the limitations that other services enforce, but gives you an easy, secure way of managing your private files. It even gives you the ability to give other people access to it, allowing you to share files seamlessly with each other. This can be great for families, friends and businesses alike to quickly and reliably get information where it needs to go.
Incomplete Instruction, what is the FTP username and Password, we didn’t set it up. What should I use?
Could you refer me to a more complete one?