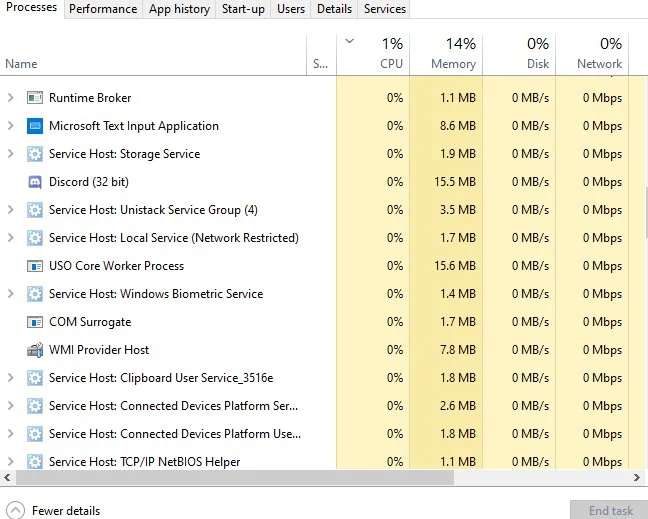
You’ve found this guide by searching for information on the MoUSO core worker process. Maybe you have experienced issues such as high resource utilization causing your system to slow down or your computer continually waking from sleep. You decided to check which processes and services were running on your system using Task Manager. You noticed a process called MoUSOCoreWorker or USOCoreWorker Process, which led you here.
This article will explain the MoUSO Core Worker Process and its function. You can also find step-by-step instructions on how to disable this process if you determine it is causing problems.
What is the MoUSO Core Worker Process?
MoUSO Core Worker Process is a Windows Update process that activates automatically when Windows initiates an update check. USO is an acronym for Update Session Orchestrator.
The MoUSO Core Worker process, or MoUSOCoreWorker.exe, replaced the wuauclt.exe executable in the Windows 10 1903 update released on May 10th, 2019. On December 8th, 2020, Version 1903 reached the end of service and was replaced with another update. Therefore, if you continue to use Windows 10 version update 1903, be aware that you have not received a security update since December 2020.
The MoUSO Core Worker process issues are most commonly related to pending updates causing MoUSO to run in the background continually. Updating Windows usually resolves these issues. You might not need to fully update your Windows 10 version; many users report that the optional KB4568831 (build 19041.423) update fixed their problem.
Other processes and files associated with MoUSO Core Worker Process include:
- usoclient.exe
- usoapi.dll
- usocoreps.dll
- usosvc.dll
Is the MoUSO Core Worker Process a virus? Is the MoUSO Core Worker Process safe?
If the MoUSO Core Worker Process is an authentic Windows 10 executable, it is not a virus. The MoUSO Core Worker Process is a Windows update process, meaning it poses no threat to your system or personal information. You can leave this process alone if you are not experiencing any of the issues outlined below.
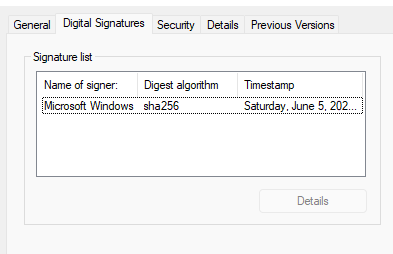
However, malicious actors can attempt to trick you into thinking that their malware is a part of the Windows operating system by masking it as a real service. To verify that the MoUSO Core Worker Process running on your system is authentic and therefore safe, you can look for a specific digital signature within the Properties of the executable:
- Open Task Manager by right-clicking on the Windows button on the Task Bar. Select Task Manager.
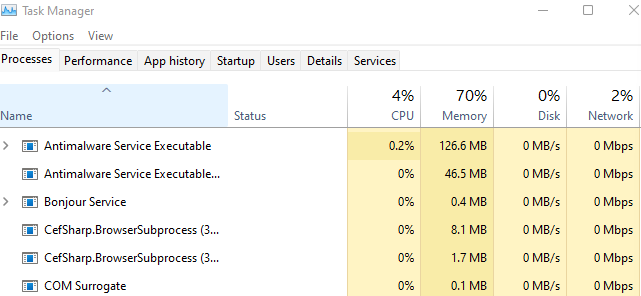
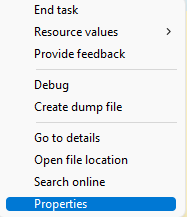
- Under the Processes tab, find the MoUSO Core Worker Process. Right-click on the process and select Properties from the drop-down menu.
- Within the Properties windows, select the Digitial Signatures tab. Then look at the Signature list. If the process is an authentic Windows process, the signer will be Microsoft Windows, and the Digest algorithm will read sha256.
If the process is not authentic, you should immediately remove this because it is malware. Select a robust anti-malware software such as Malwarebytes.
What issues are associated with the MoUSO Core Worker process?
Most Windows users have reported discovering MuOSO because their computers were acting strangely. The MoUSO Core Worker Process is associated with two issues:
1. High resource utilization (High RAM or high CPU usage)
Your computer only has a limited amount of resources based on your computer’s hardware. Therefore, when a process uses more than its fair share of system resources, you will likely experience undesired effects.
High memory (RAM) usage will cause your system to freeze, or you might even see a popup stating, ‘Your computer is low on memory.’ Free memory is needed so that your CPU can have quick access to data. When memory is low due to a single process hogging it, it leaves just a limited amount of memory accessible for all other processes.
Similarly, high CPU usage will cause you to experience major slowdowns. Your applications will take forever to load, and there will be a lag between any inputs (typing or clicking) and the computer’s reaction. CPU issues are usually attributed to overheating, but in this case, the CPU’s capacity is being negatively affected because MoUSO is constantly running in the background.
2. Waking the computer from sleep (Preventing sleep)
If your computer is randomly waking from a sleep state without any input from you, then MoUSOCoreWorker.exe is likely responsible. This Windows Update process wakes your system to check for any available updates. The frequency of this may increase if your system has pending updates that you have neglected to install.
You can use Command Prompt to can check if MoUSO Core Worker Process is responsible for this behavior:
- Press the Windows button and Enter “Command Prompt” into the search bar.

- Under the Command Prompt application option, select Run as administrator.
- When Command Prompt opens, type “powercfg /systemsleepdiagnostics” and press Enter.
- The command will execute and provide the file path for the Sleep Diagnostics Report. Copy this path. (Note: the example below is in Windows 11 and requires “powercfg /systempowerreport”, but the result is the same)

- Enter this path into Windows File Explorer, and when Windows prompts you to open the file in a browser, select the program that you would like to use. You can then check this file for any reference to MoUSO Core Worker Process.
How to fix issues related to the MoUSO Core Worker Process
Below you can find 3 step-by-step solutions to issues related to the MoUSO Core Worker Process:
1. Update Windows
Install the optional KB4568831 update that many people have reported as a fix, or perform a full Windows 10 update.
- Click on the Windows button and click the Gear Icon to open Settings.
- Find and select Update & Security from the options. On the left-hand side, find and select Windows Update.
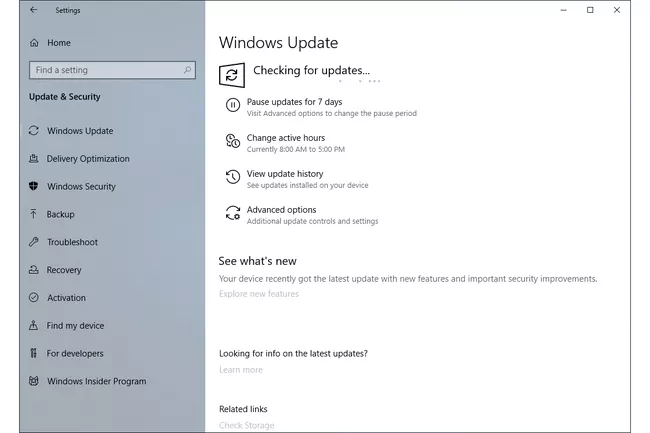
- On the right-hand side, under Windows Update, click Check for updates.
- Your system will automatically check for any outstanding updates. You will be given a chance to select which updates you want to apply.
- You can opt to update Windows 10 fully, or you can select just the KB4568831 update.
If you want to manually choose only the KB4568831 update because you are against updating your Windows version any more than necessary, you can use the Microsoft Update Catalog.
- Type “https://www.catalog.update.microsoft.com/home.aspx” into your browser’s search bar and press Enter or click on the link.

- Type “KB4568831” into the search bar. Click Search.

- If you have a Windows x64-based system, you need to select the first option. If you have a Windows 32-bit system, this is also known as an x86-based system, and you will need to select the last option.
- Click Download for whichever update applies to your system.

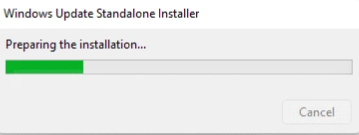
- Click Save as, and if the installation doesn’t automatically begin, navigate to the save location and double-click the executable to start the install. Follow all prompts, and the Windows Update Standalone Installer will navigate you through this process.
2. Run Windows Update Troubleshooter
Windows Update includes a fairly sophisticated troubleshooter that can help resolve their automatic troubleshooting process issues. The troubleshooter is easy to use and will automatically attempt to solve any problems it finds.
- Click on the Windows button and click the Gear Icon to open Settings.
- Find and select Update & Security from the options.
- In the left-hand pane, select Troubleshoot and then find Windows Update under the Troubleshoot heading on the right-hand side.

- Click Run the troubleshooter. Allow the troubleshooter to Detect problems, and when the troubleshooter has completed its check, it will provide you with a summary of any issues found. Then, click Apply this fix to any solutions.

- Open Windows Task Manager and check if MoUSO is still running and hogging system resources.
3. Disable Wake Timers
If your system is not experiencing any improper resource management, you may decide you don’t want to turn MuOSO off. Instead, you want to prevent the executable from waking your computer. You can do this by adjusting wake timers:
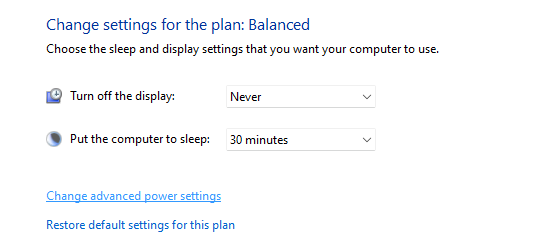
- Click the Windows button and type “Edit Power Plan” into the search bar. Click Open.

- Under Change settings for the plan, find and click Change advanced power settings.
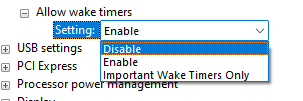
- The Power Options window will open. Scroll down until you see Sleep. Expand Sleep and select Allow wake timers. Note the setting is likely set to Enable.
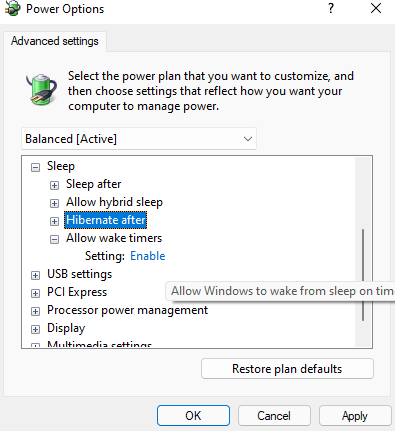
- Click Enable, and the setting will turn into an interactive drop-down box. Select Disable from the options.
- Now click Apply, then OK. Exit the Edit Plan Settings window.
You will need to monitor your computer over the next few days to see if it is waking from sleep without any input from you. If so, you should consult the Sleep Diagnostics log because something else is triggering it.
Can I disable MoUSO Core Worker Process?
Thankfully, you can opt to disable the MoUSO Core Worker Process, as it is not required for your operating system to run. The easiest way to fix issues related to the MoUSO Core Worker Process is to update your Windows operating system. Alternatively and just as easily, you can disable the Windows Update Session Orchestrator from the Services application.
The Windows Update troubleshooter is another great method to determine what’s going on with your update process and why it’s hogging all of your computer’s resources. Finally, If you decide not to disable the MoUSO Core Worker Process, you can adjust your power settings to disallow the service from waking your computer.
How to disable MoUSO Core Worker Process in the Services Application
Within the Windows Services application, you can control which Windows services are running and if they automatically start up with your computer or not. You can easily disable MuOSO by following these steps:
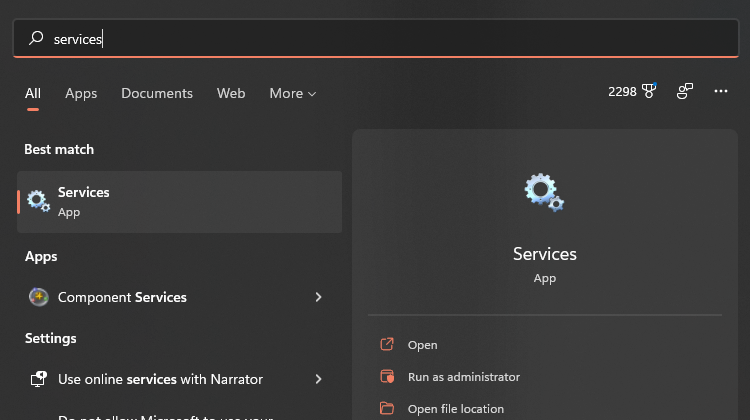
- Click the Windows button and enter “Services” in the search box. Select Run as administrator to prevent any permission errors.
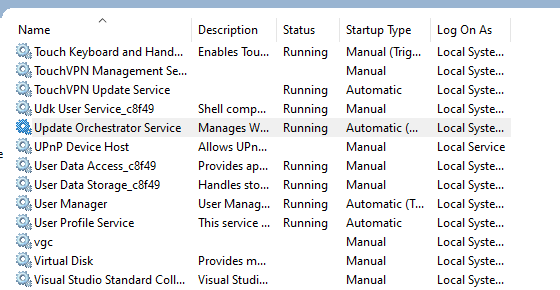
- In the newly opened Services window, scroll down until you see Update Orchestrator Service.
- Right-click on Update Orchestrator Service. In the General Tab, find Startup type and select Disabled (if you want to turn the service off completely) or Manual (if you only want the service to run when you check for updates manually).
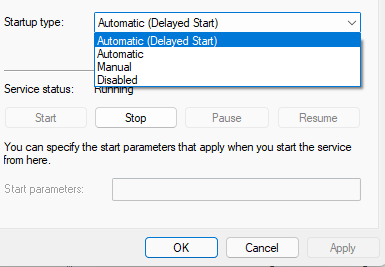
- Now find Service status on the same page and click Stop.
- Click Apply, then click OK. You can close out of the Services window. Double-check Task Manager to ensure that MoUSO Core Worker Process has been disabled.
Solved: MoUSO Core Worker Process Disabled
This troubleshooting guide provided 4 step-by-step solutions to MoUSO Core Worker Process issues, including disabling the executable. The MoUSO Core Worker Process is not a virus; instead, it’s a Windows 10 Update process and is completely safe.
A safe process may still be problematic for your system. Windows 10 users, especially those using Windows Update version 1903, have reported this process as causing high resource utilization or waking the computer from a sleep state.
If you want to stop the high resource utilization that may be slowing your computer, you can check out solutions to disable or fix problems with the MoUSO Core Worker Process. If you want to prevent your computer from being woken during sleep, we also have a solution that shows you how to disable wake timers.