Veteran Android users are quite familiar with the cache partition and clearing it as needed. But newbies might be confused about its role and don’t know how to wipe cache partition on Android.
Android’s cache sometimes gets bogged down with corrupt files and system data. Wiping the cache clears all of this data out, improving battery life and helping the device run smoother and faster. Wiping the cache is pretty easy, but you’ll need to follow the correct steps.
Continue reading to learn more about Android, what caches are, how to clear them, and have all your other questions answered.
Introduction to Android Operating System
Android is the world’s most popular operating system for mobile devices. The Android operating system is a modified open-source version of Linux, with a focus on UI customization and continuous improvement.
Google acquired Android in 2005 for only $50 million, and the first Android phone was released in 2008. This may be Google’s crowning acquisition, as Android now dominates the mobile device market, with over 70% of all devices using this operating system.
But Android has some weaknesses that sometimes crop up and annoy users. For instance, Android apps continue to run in the background, even when you are no longer using them. These background applications can slow down devices and drain the battery.
Some of the top brands and top model lines that use the Android operating system include:
- Samsung – Samsung Galaxy, Samsung Note
- Google – Pixel
- Huawei – P20, P40
- One Plus – Nord
You will be able to clear the cache partition on any of these brands after following this guide.
What are Caches?
A cache is a storage space that acts like a memory bank. Information stored in a cache can be quickly retrieved, without needing to be re-downloaded.
Caches are useful for improving system performance and user experience, by speeding up load times and lowering data needs. Caches are used in all sorts of computing applications, from computers to smartphones, to applications and hardware.
What is the Cache Partition on Android?
Android has multiple different types of caches that can be confusing for new users. Each of these caches performs the same basic function, storing data until it needs to be recalled. The differences lie in the specific application or systems that each cache is for.
- Application caches – mobile applications store temporary data that will help load the application or commonly access files quickly. For example, the Chrome web browser application may cache websites that you commonly visit, while Spotify might cache your favorite songs or the playlists you listen to all the time.
- System caches – cache files associated with the Android operating system are stored here. The cache partition is stored in the /cache directory and is completely separate from app caches
These caches are cleared using different methods. If a specific application is crashing or having issues, it’s best to clear that application’s cache. However, if your phone is acting slow or buggy in general, or multiple apps are crashing, it may be time to clear the cache partition.
Note: If your phone is running a version of Android older than Nougat 7.0, then system updates are downloaded and stored in the cache until they are applied. The update is then removed from the cache.
What happens when the cache partition is cleared?
When you clear the cache partition, any cache files are deleted. The Android operating system will automatically add any files to the cache, as appropriate. Any new cache files will be clean copies that reduce the chance of corrupt files in the cache partition.
Is data deleted with wipe cache partition?
No personal or application data is deleted when wiping the cache partition. The files that are being deleted from the cache partition are system files that you don’t need and won’t even notice have been deleted. Well, you’ll notice with the improved performance of your phone.
Wiping, or even deleting the cache partition will not affect your application files nor harm your device in any way.
How long does it take to wipe the cache partition?
Depending on how long the cache has been building on your Android phone. In most cases, the cache partition may take 10 to 15 minutes to clear. You won’t be able to use your phone during this time, but the improved experience with your phone after the wipe is worth it.
How often should you wipe the cache partition?
It’s important to note that caches can be corrupted and it’s generally a good maintenance practice to clear the cache partition regularly, particularly when your phone slows down. Just set aside 15-20 minutes where you don’t need to use your phone or receive any phone calls.
Android Recovery Mode
Android Recovery Mode is a bootable partition that is accessible for special recovery actions for the Andriod operating system. It’s a useful tool if your Android device is behaving badly and needs a quick fix like clearing the cache partition.
It’s also there if your device gets stuck in a boot loop or other catastrophic error that causes you to factory reset the phone.
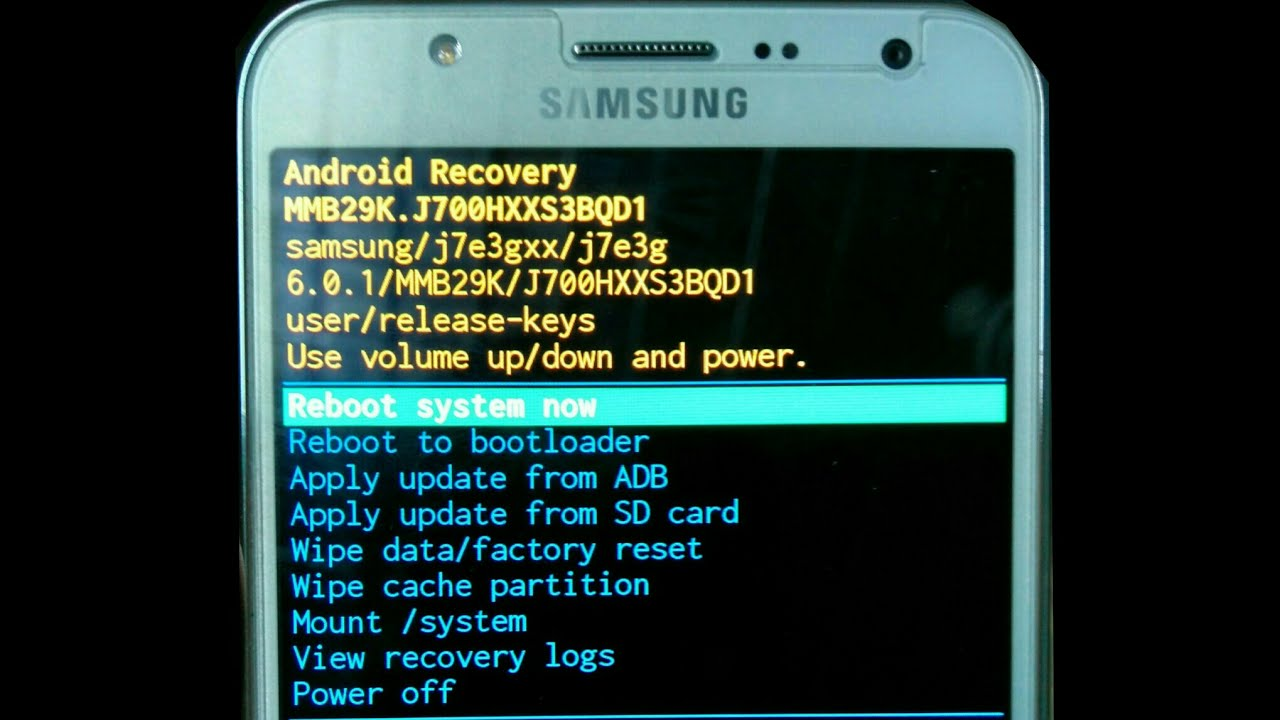
Android Recovery Mode may have up to 8 options to choose from:
- Reboot System Now or Restart System – will immediately restart your phone and return it to normal function.
- Apply Update from ADB – connect your phone to a computer to take advantage of Android Debug Bridge (ADB). This option is typically for Android developers and you probably will never use it.
- Apply Update from SD Card or Apply Update from External Storage – Transfer data from external storage, like an SD card, to the Android phone.
- Wipe data or Factory Reset – this will completely wipe your device of all your information, applications, and the cache partition. The Android device will be returned to factory settings, the same as when you first opened the box and turned it on. Always factory reset a device before giving it away so that your data isn’t accessible to anyone else.
- Wipe cache partition – this is the option to select if you want to wipe the cache partition. This partition is part of the hard drive and is used to keep regularly accessed data easily available. Clearing the cache partition can improve your phone’s performance.
- Mount /system – If you see this option, you can access your system’s core files. This is another advanced function that you probably won’t use, so it’s negligible.
- View Recovery Logs – You can look through the recovery logs for your device. You can see when and how many times you’ve reset your phone.
- Power – Since your power button is used as a select button in recovery mode, if you want to turn your device off without restarting it, you’ll have to use this option.
How to Wipe the Cache Partition on Samsung, Huawei, Google, OnePlus, Motorola, or other Android Devices
If you’re unsure of how to wipe the cache partition on your Android device, you can follow the simple steps in the directions below.
There may be some minor differences in accessing Recovery mode and wiping the cache between different brands and models, but the general menu should be the same. For example, a Samsung Galaxy Note 20 uses the volume up button to access the recovery mode, while most other Android phones use the volume down button.
Start by booting into Recovery Mode:
- Turn your Andriod smartphone off, using the power button.
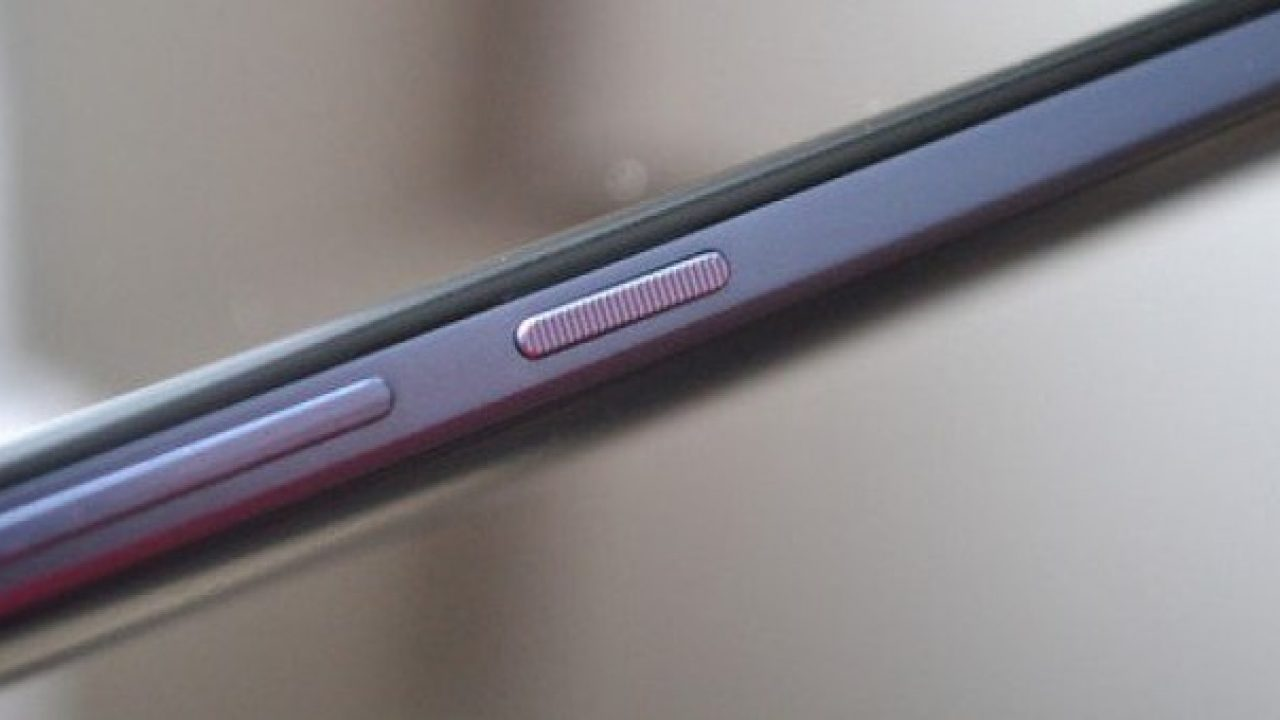
- Press the Volume Down and Power buttons at the same time. Hold and do not release until you see the device power on or your phone brand’s label appear on the screen.
Note: if you have a Samsung Galaxy Note20 or S20, you will need to use the Volume Up and the Power button.
- Once you opened in recovery Recovery Mode, your touch screen won’t work. This is intended, so don’t worry, your phone is not broken. To navigate, you need to use the volume and power buttons. The volume buttons will move you up or down the Recovery Mode menus, while the power button will act as a select key.
- Use the volume down button to navigate the Wipe cache partition. Then press the power button to select this option.
- The system cache partition will automatically be cleared. You won’t be prompted to confirm or anything. Wait for the cache partition to clear.
- Use the volume up button to navigate back to the Reboot system now. Your phone will automatically reboot and you can resume using your Android device without any issues.
Android cache partition has been cleared
The cache partition is an important part of your experience with your Andriod phone. When the cache has grown too large or has too many corrupt files, it can slow down your device. Regularly clearing your cache partition is good practice, so get comfortable with clearing the partition for your specific brand and phone model.
To clear your cache, you’ll need to power down the device and navigate within Recovery Mode using the power and volume buttons. It only takes a maximum of 15 minutes to clear the partition.
Upon restarting your phone, it should be snappier and less prone to application crashes. For the most part, the process is the same whether you’ve got a Samsung Galaxy, Google Pixel, or another type of Android phone.
Enjoy the improved phone performance and remember to clear the cache on a regular basis!