Nvidia Container is a process that – as the name suggests – contains other processes and makes sure they run smoothly. However, some bugs can cause it to take up too much of your computing power, affecting gameplay. If you are experiencing lags or problems, it is possible that the Nvidia Container is to blame.
What causes the Nvidia Container high CPU usage?
High CPU usage can be caused by any of the following:
- Driver update: if you recently updated your graphics driver, it is possible that this is causing the issue.
- GeForce Experience: this extra app is supposed to enhance your experience, but it is often the cause behind the high CPU usage.
- Nvidia Telemetry Container: this app is often to blame. Fortunately, since its only function is to gather data about the graphics card’s functioning, it can be safely disabled.
Now we are going to share a few fixes you can try. All of these have been tried and tested by numerous users.
Install a previous driver version
We will uninstall the current driver and then download an older one.
- Type “Device Manager” in the search bar and open Device Manager.
- Under Display adapters, right-click your graphics card and click Uninstall device.
- Confirm all prompts that may pop up.
- Visit the official website of NVIDIA downloads. You need to select the correct Product Type, Product Series, Produce Model and Operating System. Click on Search.
- Choose the last version before the one you just uninstalled. Click on the file, then on Download.
- If your browser asks you if you want to Run or Save the file, choose Save. This ensures that the file is not saved in a temporary folder and will remain accessible as you install the driver.
- Right-click on the .exe file you downloaded and choose Run as administrator.
- Follow the on-screen instructions to install the driver.
Disable in-game overlay
GeForce Experience has a function that allows you to record videos and take photos while you are gaming. It is called in-game overlay, and it is cool, but it might be causing your high CPU usage. Here is how you can disable it.
- Open GeForce Experience and choose Settings (cogwheel button), then General.
- Switch the In-game Overlay toggle off.
Uninstall GeForce Experience
GEForce Experience is an application designed to help you optimize your settings for gaming. You can also use it to share screenshots with friends. That said, a lot of users have the high CPU usage problem because of it, and it is completely safe to remove. Here is how you do it.
- Click on Start>Settings.
- Choose Apps.
- Locate Nvidia GEForce Experience on the list. Click on it then choose Uninstall.
- Confirm uninstall.
Disable Nvidia Task Scheduler and Telemetry Container
Nvidia Telemetry Container is an app that collects data about your usage and behaviour, and forwards it to Nvidia so they can better fix bugs in their software. However, many users find that this app causes high CPU usage. You can safely kill all the tasks scheduled by this program, as well as the service itself, and you might experience an instant improvement!
- Type “control panel” in the Search bar and click Open.
- Make sure you chose Large icons in the top right corner. Select Administrative tools.
- Find Task scheduler in the list then click it.
- Find all tasks starting with NvTm, right-click them one by one, then choose Disable for each.
This disabled all the scheduled tasks. Now we will go and stop the service itself from running.
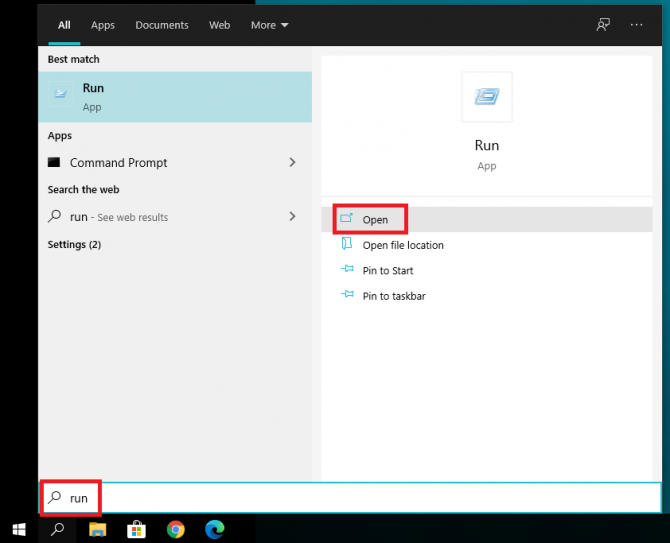
- Type “run” in the Search bar, then click Open.
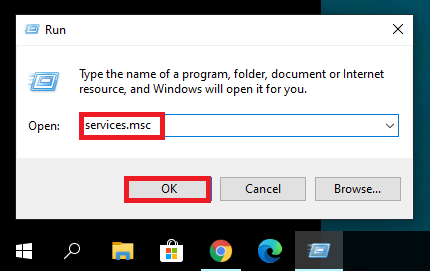
- In the Run app, type “services.msc” then click OK.
- In the Services app, locate NVIDIA Telemetry Container, right-click it then choose Properties.
- Under Service status, click Stop.
- Under Startup type, choose Disabled from the drop-down menu.
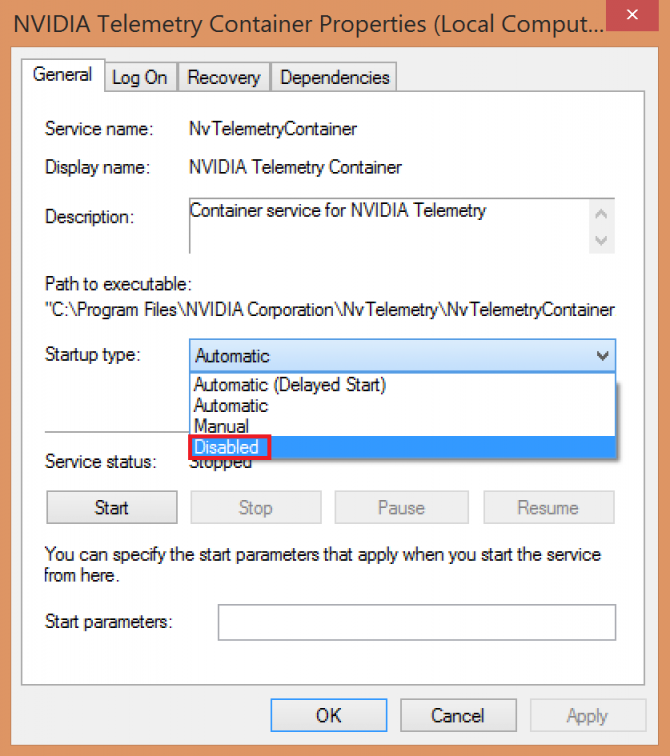
- Click Apply then OK.

Now the telemetry service is disabled. Check if the CPU usage decreased! If it didn’t, it means that the Display Container is still active. In the next fix, we will disable that.
Disable Nvidia Display Container
The Nvidia Display Container is another process that is not vital, but can cause the high CPU usage. We will end this task and also delete the related folder.
- Navigate to the following location: C:\Program Files\NVIDIA Corporation\Display.NvContainer\plugins\LocalSystem\
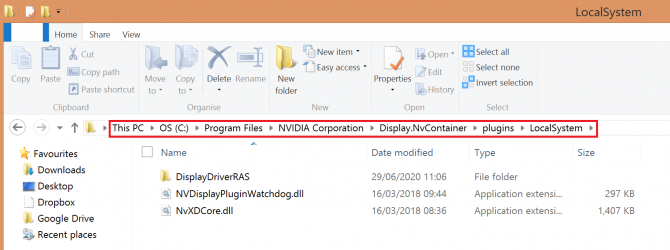
- Right-click the DisplayDriverRAS folder and choose Delete.

- Now navigate to the following location: C:\Program Files\NVIDIA Corporation.
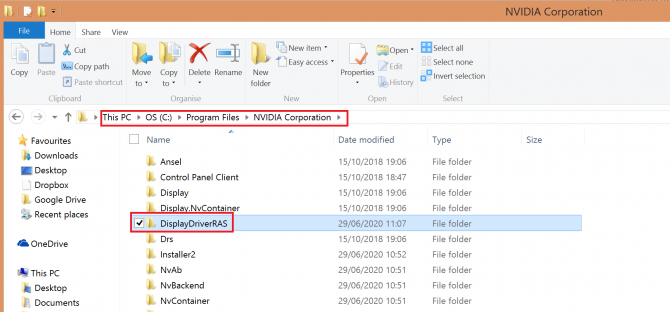
- Locate the DisplayDriverRAS folder, right-click and choose Delete.

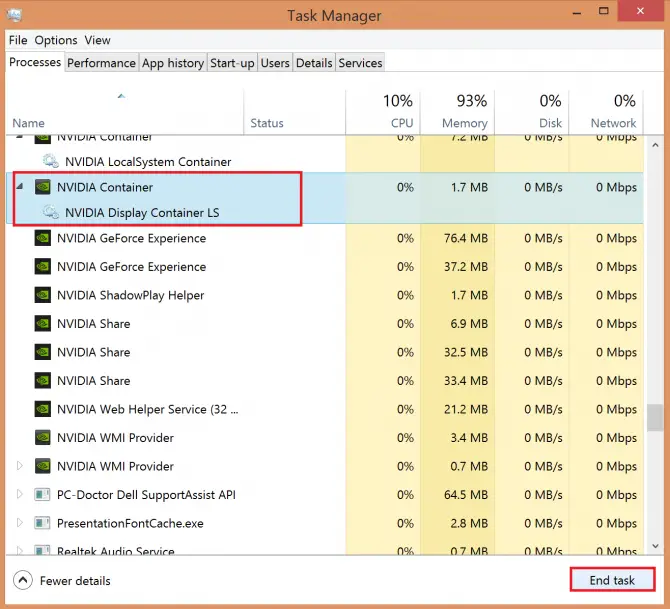
- Open Task Manager by pressing Ctrl+Alt+Del. Find the Nvidia Display Container Local System process, then click End task.
Restart services
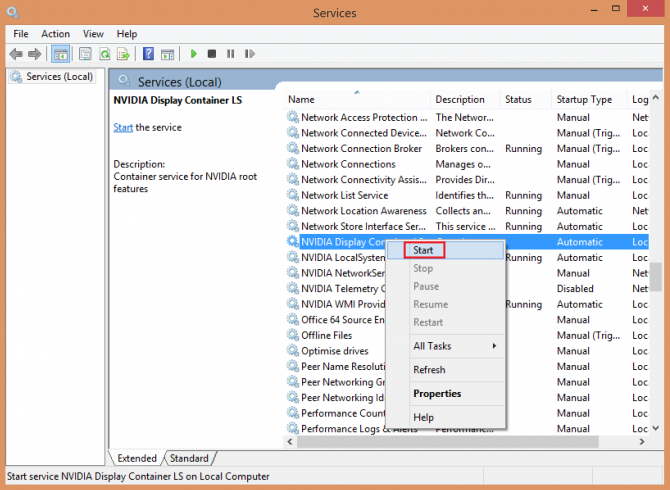
Sometimes the good old “turn it off and on again” works for programs. We will now try this on the Nvidia Display Container LS.
- Type “run” in the Search bar and click Open.
- Type “services.msc” in the Run app and click Open.
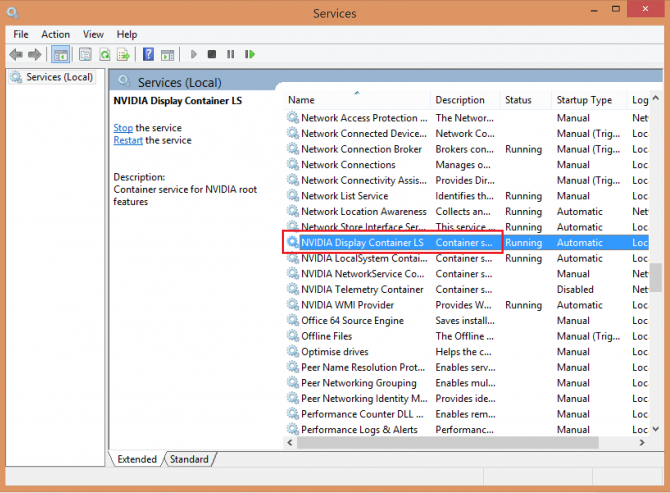
- Locate NVIDIA Display Container LS.
- Right-click it then choose Stop.
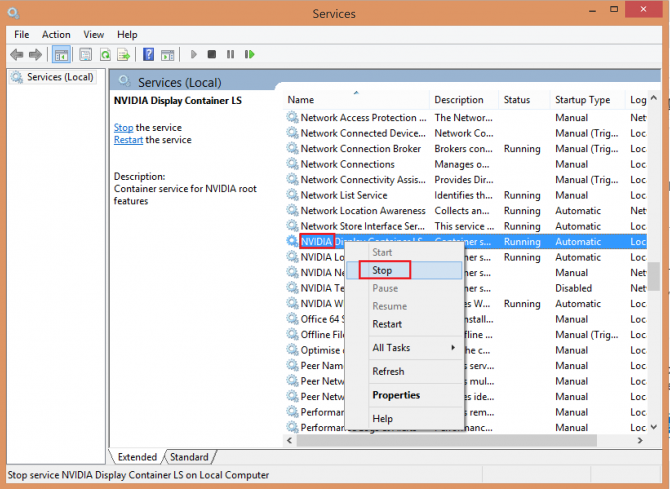
- After a short while, right-click again then choose Start.
Check if this solved the problem. If it didn’t, there is one more fix you can try, however, it is entirely at your own risk, as it might damage the system!
Delete the Telemetry Container package
The Telemetry container package is what controls the whole telemetry process. Deleting it has solved the high CPU issue for many users. Be aware though that it is not a recommended fix, and it can cause system damage. Make a backup before you try this!
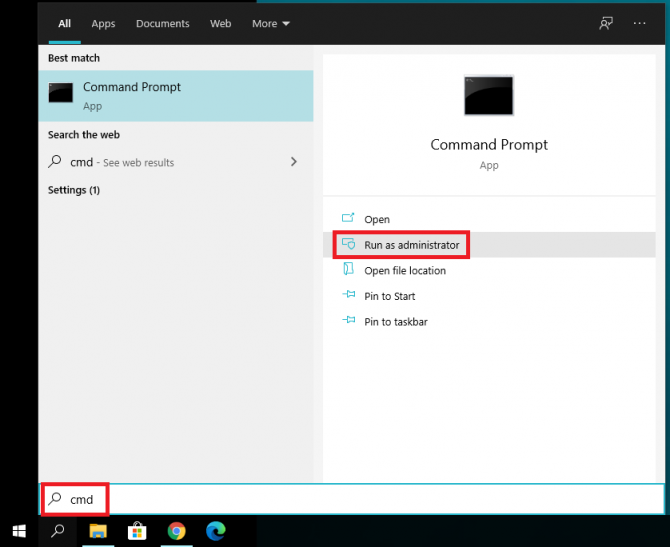
- Type “cmd” in the Search bar then click Run as administrator.
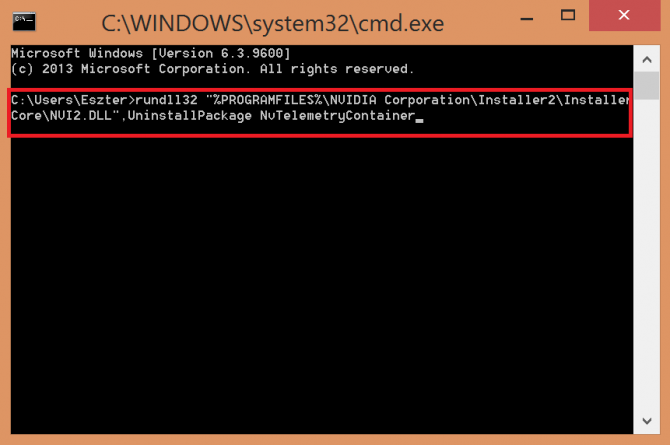
- Type in the following command: “rundll32 “%PROGRAMFILES%\NVIDIA Corporation\Installer2\InstallerCore\NVI2.DLL”,UninstallPackage NvTelemetryContainer” and press Enter.
Hopefully this solved your problem and didn’t crash your system.
Conclusions
Nvidia has quite a complex software, that they are trying to adapt to many different computer setups and settings, and this sometimes leads to hiccups. We hope you found these methods useful and you managed to curb your CPU usage.